TL;DR
Moving your rig into a closet or another room is the most effective way to reduce noise. Proper placement, door sealing, and targeted dampening inside the closet can turn a tiny space into a surprisingly good recording booth, without expensive soundproofing.
Acoustic dampening
& the rig in the closet.
The most powerful noise fix isn’t a material — it’s a floor plan. A rig you can’t hear because it’s in another room beats any amount of foam. Tap the approaches in Part 1 to see what actually works.
(another room)
(levers 1–4)
(door / barrier)
(acoustic foam)
Contain the noise, not the heat
Key Takeaways
- Moving your rig into a separate room or closet dramatically reduces noise and reflections, often more than any foam treatment.
- Effective ventilation is essential for closet setups—passive vents, exhaust fans, or ducting keep the hardware cool and quiet. See this guide on acoustic dampening and placement for more details.
- Treat the first reflection points with foam or blankets—don't rely solely on corner bass traps or heavy dampening.
- Seal door gaps with weatherstripping, blankets, or curtains to cut sound leaks by up to 15 dB.
- In small spaces, addressing bass buildup with traps or thick foam improves clarity and reduces boxiness.
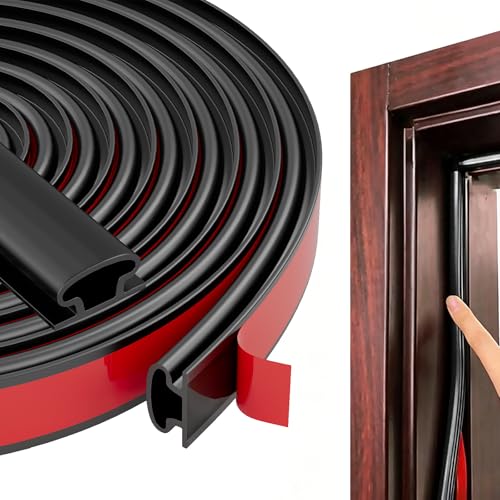
Black Rubber Weather Stripping Door Seal Strip, D Shape Door Weather Seal Strip, Self-Adhesive Soundproofing Frame Insulation Tape for Doors Frame/Window Seal,Blocks Cold Drafts Noise
- Thickened Silicone Material: Blocks air, noise, dust, and weather
- Customizable Size: Cut to fit gaps from 0.1 to 0.22 inch
- Strong Adhesion: Securely bonds without peeling or residue
As an affiliate, we earn on qualifying purchases.
As an affiliate, we earn on qualifying purchases.
Why Moving Your Rig Is the Simplest, Most Effective Fix
Moving your computer or audio setup into another room is the single most effective way to cut down noise. Think of it like putting a thick wall between you and the source. If your rig lives behind a door or in a closet, it’s often silent to you, even if it’s roaring behind the scenes.
For many, especially those working with AI or heavy-duty audio, the rig doesn’t need to be next to them. You connect over the network, SSH, or remote desktop. So, the loud hardware can hide in a closet or basement, and your workspace remains peaceful.
In practice, this means less effort and money spent on soundproofing, and more on ventilation and airflow. It’s a game-changer for hobbyists and pros alike.
The 'Rig in the Closet' Setup — How to Keep It Cool and Quiet
Putting a hot, high-load computer in a closet can work wonders for noise—if you handle the heat properly. The biggest mistake? Sealing it completely. Trapped heat will cause fans to run faster, defeating the purpose.
To keep your rig cool and quiet, you need active ventilation. Think of it like a mini climate control system—passive vents, exhaust fans, or ducted airflow. A well-designed soundproof cabinet uses these tricks to vent hot air while muffling noise.
For example, a custom-built soundproof enclosure with a thermostatically controlled fan can keep your setup at a comfy 70°F while staying under 40 dB. That’s quieter than a whisper, but it still cools the hardware efficiently.
Check out this guide on [reducing heat and noise in your AI workstation](https://thorstenmeyerai.com/reduce-heat-noise-ai-workstation/) for detailed tips.
Acoustic Dampening vs. Soundproofing: What You Need to Know
Acoustic dampening and soundproofing are different tools, but both matter in a closet setup. Dampening reduces echoes inside the space, making vocals clearer and less boxy. Soundproofing prevents sound from leaking out or sneaking in.
Inside a closet, your goal is to tame reflections—think of soft blankets, foam panels, and rugs as your allies. You might find wall panels and acoustic treatments helpful. For stopping sound from escaping, focus on sealing gaps around the door, vents, and any cracks. Use weatherstripping, heavy curtains, or blankets to block leaks.
For example, a thick moving blanket draped over the closet door can cut leakage by 10-15 dB, making a huge difference. But it won’t stop sound passing through the walls—so treat those separately with foam or panels.
Placement and Treatment: Making Your Closet Sound Like a Studio
Where you put your mic and how you treat the space around it determine your sound quality. For more on placement, see this acoustic treatment guide. Start with the mic placement: position it near a wall or corner, but not directly in it, to avoid excessive reflections.
Next, treat the first reflection points—these are the surfaces where sound bounces before reaching your mic. For a closet, focus on the wall behind the mic, the ceiling, and the side walls. Use foam panels, blankets, or DIY absorbers.
For example, hanging a foam panel directly behind your mic reduces echo and flutter, making your voice sound warmer and clearer. Covering about 20-30% of the wall surface with soft material often yields noticeable improvements.
Check out this [guide on acoustic treatment](https://thorstenmeyerai.com/reduce-heat-noise-ai-workstation/) for specific placement tips.
Sealing the Door and Other Leaks — The Hidden Noise Culprits
The door gap is often the biggest leak in a closet setup. Even a tiny crack can let in or leak out a surprising amount of sound. Seal it with weatherstripping or a heavy curtain. Hanging a thick moving blanket over the door opening can cut noise significantly.
Don’t forget the bottom gap—placing a draft stopper or a rolled-up towel can block sound slipping underneath. For best results, combine multiple sealants: foam strips, blankets, and acoustic gaskets.
For example, sealing the door gap can reduce sound leaks by up to 15 dB, making your mic much less sensitive to outside noise. It’s a simple, low-cost fix with big payoff.
Taming Low-End Buildup and Flutter Echo in Small Spaces
Small rooms often develop standing waves, causing boomy bass or flutter echo. In a closet, walls are close and parallel, amplifying these issues. Using bass traps or thicker foam can help tame the low frequencies.
For example, placing a bass trap in the corner behind your mic can reduce muddiness and improve clarity. If space is tight, use dense, thick foam panels or DIY traps made from rockwool or mineral wool.
In practice, addressing these low frequencies makes your recordings sound more natural and less boxy—especially important if you’re doing voice-over or singing.
Practical Tips for a Functional, Safe, and Clean Closet Rig
Creating a closet rig isn’t just about sound. You need power outlets, cable management, ventilation, and safety. Check out this practical closet setup guide for more tips. Use surge protectors to shield your gear. Keep cables tidy with hooks or clips. Make sure the space has good airflow—no one wants a smoking rig.
For example, installing a power strip with a surge protector inside or near the closet keeps things safe and accessible. Use removable hooks or mounting strips for cables, so you can tweak your setup without damage.
For detailed setup ideas, see this [guide on practical closet rigging](https://thorstenmeyerai.com/reduce-heat-noise-ai-workstation/).
Frequently Asked Questions
Is acoustic foam enough for a closet booth, or do I need blankets and panels too?
Acoustic foam helps reduce reflections and flutter echo, but in small spaces, blankets and heavier materials often dampen room reverb more effectively. Combining foam with blankets or DIY panels usually gives the best result.Where should I place the microphone for the best sound in a closet?
Position the mic near a corner or against a wall, but avoid being directly in a corner. First, treat the wall behind the mic to minimize early reflections. Keep the mic at about mouth level and use a pop filter for clarity.How do I stop sound from leaking through the closet door?
Seal the door gaps with weatherstripping or draft stoppers. Hanging a thick blanket or moving pad over the door opening also helps. Combining these methods can reduce sound leaks by over 15 dB.Are bass traps necessary in such a small space?
In tiny closets, bass buildup can be a real issue, especially with parallel walls. Using bass traps or dense foam panels in the corners can significantly improve low-frequency response and overall sound clarity.Can I make my closet sound professional, or is it just for demos?
With proper treatment, placement, and ventilation, a closet can produce very high-quality recordings. It’s not just for demos—many podcasters and vocalists use closet booths for professional results.Conclusion
Your closet can become a surprisingly good studio with a bit of strategic placement and thoughtful treatment. Remember: distance beats all when it comes to noise. Treat the reflection points, seal leaks, and ventilate well. The result? Clearer recordings, less stress, and a workspace that feels like a real studio—without the price tag.
Next time your gear roars, don’t think about more foam. Think about moving it out of your space, sealing the leaks, and treating those key reflection spots. Quiet, professional sound is within reach—just behind that closet door.