Aroma Diffuser
How to Make Your Own Aromatherapy Diffuser: A DIY Project!
Get ready to create a personalized aromatherapy diffuser that enhances your space—discover the simple steps to start your DIY project now!
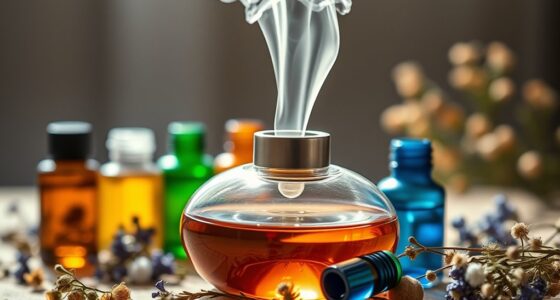
Making your own aromatherapy diffuser is a fun and easy DIY project. Start by choosing a narrow glass or ceramic container. Use rattan reeds, which are great for absorbing essential oils. For the base liquid, mix 30% essential oil with 70% carrier oil, or try a combination of water, alcohol, and essential oil. Popular oils like lavender or citrus can enhance your space's aroma while promoting relaxation. Place the reeds in the mixture and let them soak for a few hours before flipping them for better scent diffusion. Keep going to explore more tips for personalizing your diffuser experience!
Key Takeaways
- Select a narrow opening container made of glass or ceramic to enhance diffusion and maintain essential oil quality.
- Use rattan reeds that are twice the height of the container for optimal scent release and absorption.
- Mix 30% essential oil with 70% carrier oil, or try other base liquid combinations for effective diffusion.
- Choose essential oils like lavender or citrus for uplifting and calming effects, or experiment with blends for personalized aromas.
- Replace the base liquid every few weeks to ensure the fragrance remains strong and effective.
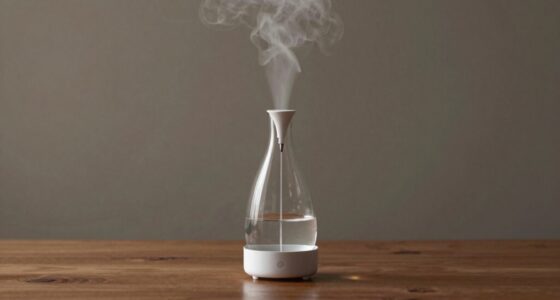
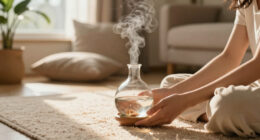
Purpose of Essential Oil Diffusers
Essential oil diffusers serve an essential purpose in enhancing your living space by dispersing delightful aromas that deodorize and purify the air.
Unlike commercial air fresheners, which often contain artificial fragrances, an essential oil diffuser allows you to enjoy natural scents while controlling the ingredients. This makes it a fantastic DIY project, enabling you to customize your experience to suit your mood or needs.
By using various essential oils, you can create a calming environment, reduce stress, and even alleviate feelings of depression. Additionally, research shows that certain scents can trigger the release of neurotransmitters like serotonin and dopamine, further promoting emotional well-being.
Plus, homemade diffusers are a cost-effective and safer alternative, ensuring you breathe cleaner air.
Embrace the therapeutic benefits of essential oils and transform your indoor atmosphere today.
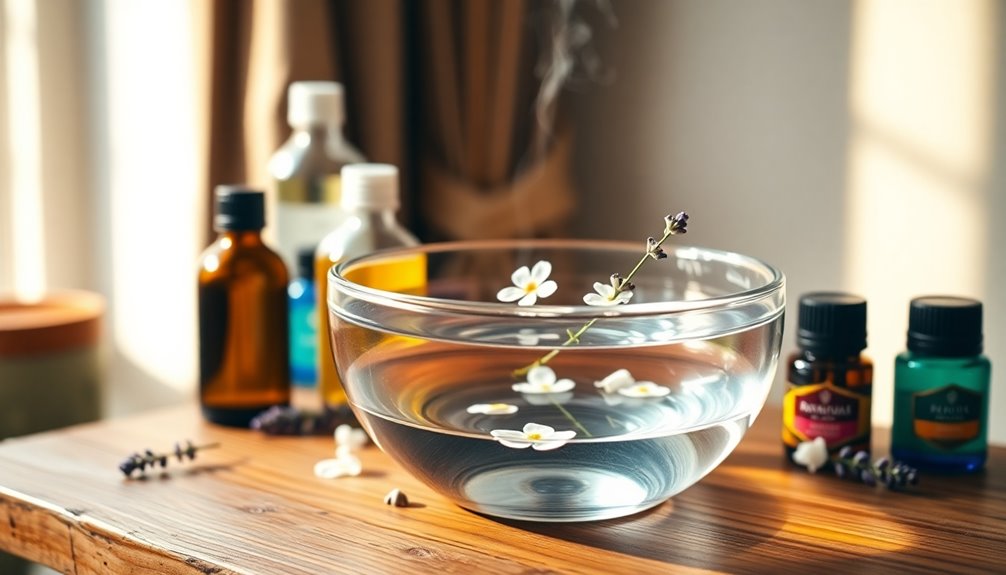
Choose a Container
Selecting the right container is essential for your DIY aromatherapy diffuser. Opt for jars or containers with narrow openings; this minimizes evaporation and enhances the scent diffusion effectiveness. Many essential oils can improve indoor air quality, making them a great addition to your home environment. Certain essential oils, such as eucalyptus oil, are particularly beneficial for respiratory health. Additionally, using essential oils for hair growth can enhance the overall wellness experience in your space.
Glass or ceramic options are ideal, as they're durable and help maintain the integrity of your essential oils. Small vases or repurposed spice jars can also serve as charming diffuser containers. You can often find a variety of suitable options at thrift stores, making it easy to discover unique finds at low prices.
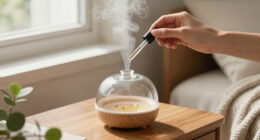
If you choose corked jars, consider drilling holes in the cork to accommodate reeds for better oil exposure. This simple step will maximize the diffusion experience and allow you to enjoy your favorite scents fully. Furthermore, using dark glass bottles for storage can help preserve the quality of your essential oils.
Select Reeds for Diffusion
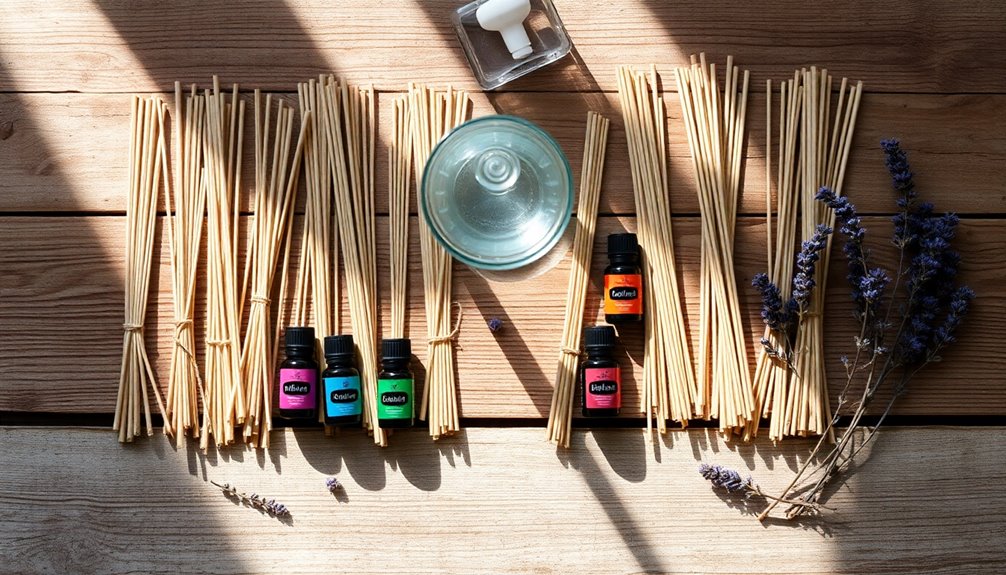
When selecting reeds for your diffuser, consider using rattan sticks for their porous nature, which helps the oils travel effectively.
You should also pay attention to the length, aiming for reeds that are about twice the height of your container to maximize scent release.
Avoid heavier materials, as they won't absorb the oil as well, diminishing your aromatic experience.
Types of Diffuser Reeds
Choosing the right reeds for your diffuser is crucial for an ideal aromatherapy experience. You have several options to evaluate, each with its own benefits.
Type of Reed | Material | Effectiveness |
---|---|---|
Reed Diffuser Sticks | Rattan | High absorption, best diffusion |
Bamboo Skewers | Bamboo | Budget-friendly, less effective |
Unfinished Reeds | Balsa Wood | Good oil travel, safe for scents |
Narrow Reeds | Rattan/Balsa | Better upward liquid travel |
Treated Reeds | Various | Not recommended, alters scent |
When selecting, verify your reeds are untreated. This way, your essential oil mixture will diffuse beautifully, filling your space with delightful aromas. Additionally, using essential oils for mental clarity can enhance your overall aromatherapy experience. Understanding the principles of comparative advantage can also help you make informed choices in selecting the most effective reeds for your needs.
Optimal Reed Length
To achieve the best diffusion of essential oils, it's important to take into account the length of your reeds.
- Aim for reeds approximately twice the height of your container for effective scent diffusion.
- Use 4 to 6-inch reeds for smaller jars, ensuring prime performance.
- Opt for narrower rattan reeds over bamboo for better liquid travel and scent release.
Using 8 to 12 reeds in a standard-sized diffuser will help distribute the aroma evenly.
The porous nature of rattan allows for superior absorption, enhancing the diffusion process.
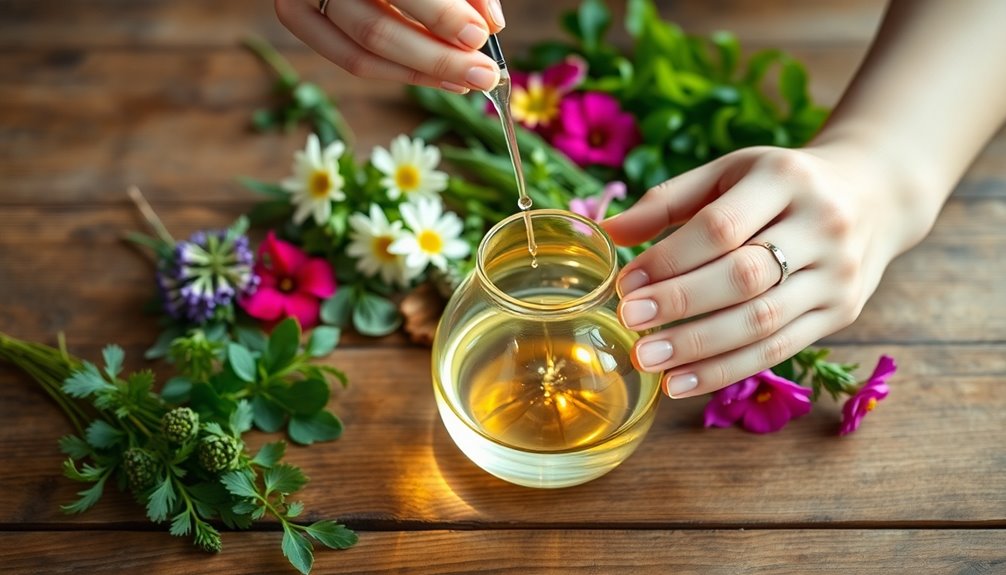
Base Liquid Options
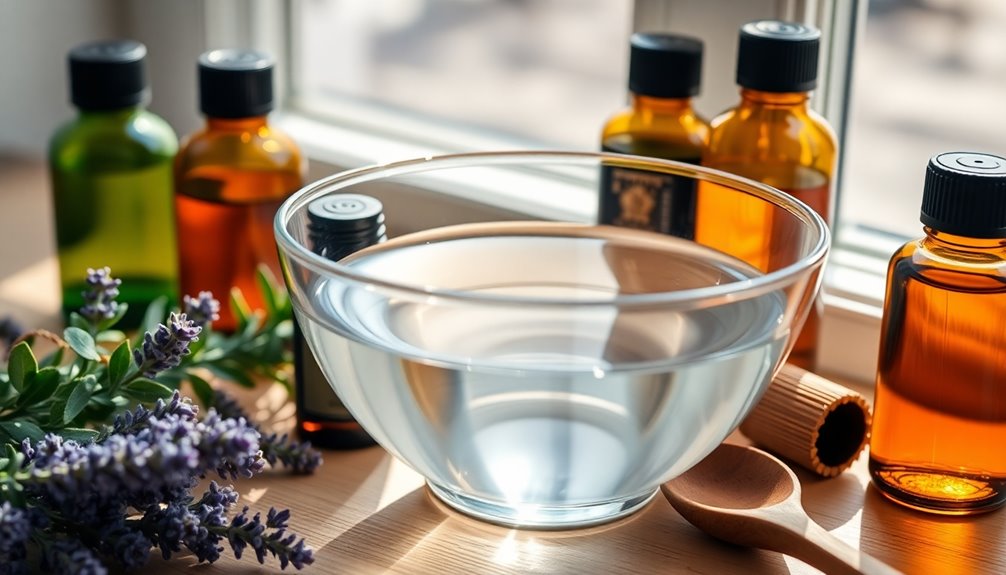
While creating your DIY aromatherapy diffuser, selecting the right base liquid is essential for achieving an ideal scent experience. A common option is a mixture of 30% essential oil with 70% carrier oils, like sweet almond or safflower oil, which optimizes scent diffusion.
Alternatively, you can mix 1/4 cup hot water with 1/4 cup alcohol and 20-25 drops of essential oil for better scent dispersion. For a more robust blend, consider combining 1/4 cup carrier oil with 2-3 tablespoons of vodka.
Just avoid using mineral oil or heavy oils like coconut oil, as they can block the reeds. Don't forget to top off and replace your base liquid every few weeks to maintain fragrance strength!
Best Essential Oils to Use
Essential oils play an important role in creating the perfect ambiance for your DIY aromatherapy diffuser. Choosing the right oils can enhance your space and elevate your mood. Here are some standout options:
- Lavender essential oil: Known for its calming properties, it helps reduce anxiety and improves sleep quality. Additionally, research indicates that flower teas can also contribute to relaxation and stress relief. Aromatherapy can enhance mood and alleviate anxiety symptoms, making lavender a top choice for your diffuser.
- Citrus oils: Oils like lemon and sweet orange are uplifting and energizing, perfect for enhancing mood and reducing stress.
- Sandalwood oil: This grounding scent alleviates feelings of depression and promotes relaxation.
Combining these oils can lead to a balanced aroma. For example, mixing lavender and bergamot creates a tranquil scent that supports emotional well-being. Additionally, incorporating oils derived from herbal alternatives can provide added benefits for your skin and overall vitality.
Experiment with these oils to find your perfect blend!
Maintenance and Tips for Use
Creating your ideal blend of essential oils is just the beginning of enjoying a satisfying aromatherapy experience. To maintain that delightful aroma, regularly check the liquid levels in your diffuser and refill as necessary. This guarantees a continuous scent experience.
Don't forget to rotate the reeds weekly; saturated reeds can lose their effectiveness, so this simple step enhances diffusion and keeps the aroma strong. Every 2-3 weeks, replace the essential oil mixture to keep things fresh and consider experimenting with new blends for added variety.
Finally, store your essential oils in a cool, dark place to preserve their potency and prevent rancidity. With these tips, you'll enjoy a vibrant, long-lasting scent in your space.
Frequently Asked Questions
How to Make a DIY Essential Oil Diffuser?
To make a DIY essential oil diffuser, start with a small glass or ceramic container that has a narrow opening to keep the scent strong.
Mix 30% essential oil with 70% carrier oil like sweet almond oil.
Insert 8-12 reeds or bamboo skewers, ensuring they're tall enough for good diffusion.
Pour the oil mixture in and let the reeds soak for a few hours.
Flip them weekly to refresh the scent and replace the oil every few weeks.
What Is the Best Material for Homemade Diffuser?
The best material for a homemade diffuser is glass or ceramic, especially with a narrow opening. This design helps prevent evaporation and keeps the scent strong.
Rattan reeds work well because they're porous, allowing oils to travel upward effectively.
Opt for sweet almond or safflower oil as your carrier oil, since they're the right viscosity.
Finally, consider repurposing jars or small vases from thrift stores for an eco-friendly touch.
How to Make Diffusers to Sell?
Imagine stepping into a chic boutique where the air's infused with delightful scents.
To make diffusers to sell, start by researching popular essential oil blends your target market loves. Invest in quality materials for a premium feel.
Set competitive prices that cover your costs while attracting buyers. Craft a marketing strategy emphasizing eco-friendliness and customization.
Finally, reach out to local markets and online platforms to showcase your beautiful creations and connect with customers.
How Do You Improvise a Diffuser?
To improvise a diffuser, grab a small glass or ceramic container with a narrow opening.
Mix 1/4 cup of unscented oil with 3 tablespoons of rubbing alcohol or vodka, then add 20-30 drops of your favorite essential oil.
Use bamboo skewers or wooden chopsticks as your diffusion tools. Insert them into the mixture, ensuring they're twice the height of the container.
Flip them weekly and replace the mixture every 2-3 weeks for lasting scent.
Conclusion
You've crafted your own aromatherapy diffuser, and now your home smells like a spa—just what you need during a Netflix binge. Who knew that a simple DIY project could turn your living room into a zen paradise? While you're busy unwinding, just remember to keep an eye on those reeds; they can get a little too relaxed themselves. Enjoy your aromatic oasis, and may your stress float away like a forgotten grocery list!
As the Editor in Chief, Hyperosmia plays a pivotal role in shaping the content and direction of Aroma Oil Diffusers. With a discerning eye for detail and a passion for research, Hyperosmia ensures that our articles, guides, and resources are informative, accurate, and engaging. Through meticulously curated content, Hyperosmia strives to educate our readers on the latest trends, techniques, and benefits of aromatherapy.
Aroma Diffuser
How to Use Shower Aromatherapy Bursts: Refresh and Relax!
Master the art of rejuvenation with Shower Burst® aromatherapy tablets for a spa-like experience, and discover more tips to enhance your relaxation journey!
To use Shower Burst® aromatherapy tablets, unwrap one and place it in the provided sachet, hanging it away from direct water flow. Activate the tablet by moistening it with water and humidity, which releases the soothing essential oils. You'll enjoy invigorating scents like grapefruit and calming lavender that create a spa-like atmosphere in your shower. After your shower, let the tablet dry completely for reuse, as each one can last for about 6-8 uses. This simple routine elevates your self-care while revitalizing and relaxing you. Keep going for more tips on maximizing your aromatherapy experience!
Key Takeaways
- Unwrap a Shower Burst® tablet and place it inside the provided sachet for easy hanging in your shower.
- Hang the sachet away from direct water flow to ensure the tablet lasts longer during use.
- Activate the tablet by moistening it with water, allowing the essential oils to release their therapeutic aromas.
- After use, allow the tablet to dry completely for up to 6-8 showers, maximizing its longevity.
- Enjoy the calming effects of essential oils like Lavender and uplifting scents like Sweet Orange for a refreshing shower experience.
Product Overview
Shower Burst® tablets transform your daily shower into a rejuvenating experience with their blend of essential oils like Grapefruit, Lavender, and Sweet Orange. These all-natural ingredients are designed to activate your senses, creating a mood-boosting aromatherapy experience. Each tablet comes individually packaged in a sachet, making it easy to hang in your shower. Inhalation of essential oils promotes relaxation and reduces anxiety symptoms, enhancing your overall experience. Additionally, the use of essential oils for respiratory health can further enhance your breathing, making your shower routine even more refreshing. As the water and humidity interact with the tablet, they release therapeutic aromas that evoke a spa-like atmosphere. The Variety Pack offers four unique scents—Healing, Clarity, Relax, and Refresh—each crafted to enhance your well-being. Furthermore, studies suggest that aromatherapy can lead to increased energy levels, ensuring you feel revitalized throughout your day. The calming effects of lavender essential oil can also aid in promoting a peaceful environment during your shower. Plus, after use, these tablets can dry out for reuse in subsequent showers, ensuring you can enjoy extended relaxation and refreshment from just one tablet.
Usage Instructions
To get the most out of your Shower Burst® tablets, start by unwrapping one from its packaging.
Place the tablet in the provided sachet for easy hanging in your shower. Hang the sachet in a spot away from direct water flow to maximize the tablet's longevity and effectiveness.
To activate the tablet, let the water and humidity moisten it, which releases the essential oils into the air, enhancing your shower routine.
After each use, allow the tablet to dry completely before re-wetting it for activation during subsequent showers. Each tablet can typically last for around 6-8 uses, depending on how often it gets wet.
Enjoy the invigorating experience! Additionally, using essential oils for relaxation can enhance your overall shower experience and promote a calming atmosphere.
Benefits of Essential Oils
Essential oils offer a powerful way to enhance your shower experience, delivering both emotional and physical benefits. Incorporating aromatherapy into your routine can help you revitalize and relax, providing a boost to your overall well-being. For instance, Grapefruit essential oil is energizing, invigorating your senses and lifting your spirits. Lavender, on the other hand, is perfect for those moments when you need to unwind, as it calms stress and anxiety, creating a tranquil atmosphere. Additionally, studies show that using essential oils like beet juice can also support overall cellular health, enhancing your body's natural balance. Moreover, some essential oils may contain antioxidants that help combat oxidative stress. Turmeric's anti-inflammatory properties can also be beneficial when combined with essential oils for soothing muscle tension. Sweet Orange essential oil adds a cheerful note to your shower, uplifting your mood with its invigorating aroma. By using these essential oils, you embrace a holistic approach to self-care, promoting mindfulness and rejuvenation in your daily rituals. Additionally, using essential oils in your shower can also promote mood enhancement and create a calming environment for relaxation.
Customer Experience
Incorporating aromatherapy into your routine can truly transform your shower experience, and customers are raving about it. They've discovered that Shower Burst® products, infused with mood-boosting essential oils, elevate their showers into rejuvenating spa experiences. Users report enhanced relaxation and mindfulness, making these bursts perfect for self-care routines after a long day. Additionally, using aromatherapy can align with your subconscious power to enhance overall well-being, as many essential oils can improve indoor air quality and create a refreshing environment. Regular use of these products can also lead to improved skin texture and hydration, contributing to a more radiant appearance. Black tea is known for its robust flavor and can also be a part of a calming routine when enjoyed after a refreshing shower.
Here's a glimpse of what you can expect:
Feature | Benefit | Customer Feedback |
---|---|---|
Pure Essential Oils | Promotes relaxation | "I feel so much calmer!" |
Longevity | Multiple uses per tablet | "Great value for money!" |
Convenient Packaging | Easy to use | "Love the reusable sachets!" |
With thoughtful packaging and effective formulas, it's no surprise that the customer experience is overwhelmingly positive!
Ordering Information
When you're ready to elevate your shower experience with Shower Burst products, placing your order is a breeze.
The Shower Burst® Variety Pack, priced at $19.95, offers four distinct scents made with 100% pure essential oils, ensuring a unique aromatherapy experience.
To guarantee delivery in time for Christmas, make sure to place your order by 12/6/24. Currently, orders can only be shipped within the United States and U.S. territories, as international shipping isn't available.
If you need to return an item, returns are accepted within 14 days of purchase, but remember to keep the original packaging.
For any inquiries or assistance, customer support is ready to help via phone at 800-927-2375 or email.
Enjoy your all-natural ingredients journey!
Frequently Asked Questions
How Do You Use Aromatherapy Shower Burst?
To use an aromatherapy shower burst, unwrap the tablet and place it in the provided sachet.
Hang the sachet in your shower, avoiding direct water contact. As you shower, the humidity will activate the tablet, releasing soothing essential oils into the air.
After your shower, let the tablet dry completely for reactivation in future showers.
Enjoy the invigorating scents and calming effects that enhance your overall shower experience.
How Do You Use Aromatherapy in the Shower?
When it comes to using aromatherapy in the shower, you're really in for a treat!
To get started, simply choose essential oils that resonate with you—like energizing citrus or calming lavender. Add a few drops to your shower floor or use a diffuser.
As the steam rises, the scents will envelop you, creating a spa-like atmosphere.
Make sure to take a moment to breathe deeply and let the aromas work their magic.
Enjoy!
What Does a Shower Burst Do?
A shower burst transforms your shower into a spa-like experience. When you activate it with water, it releases a blend of essential oils that invigorate or calm your senses.
You'll feel the stress melt away as the aromas fill the air, enhancing your mood and promoting relaxation. Each burst is designed for multiple uses, so after your shower, you can let it dry out and use it again for another uplifting session.
How to Use Aromatherapy in a Steam Shower?
Imagine stepping into a steam shower after a long day, ready for relaxation.
To use aromatherapy effectively, unwrap your Shower Burst and place it in the sachet. Hang it in the steam shower, away from direct water, so the humidity activates the essential oils.
This setup allows the steam to carry the soothing scents around you, enhancing your experience. By drying the sachet between uses, you can enjoy multiple showers of calming aromas.
Conclusion
Incorporating shower aromatherapy bursts into your routine can transform your daily wash into a rejuvenating escape. Remember, "a little goes a long way" when it comes to enhancing your shower experience. By using these bursts, you not only refresh your mind but also relax your body, allowing you to face the day with renewed energy. So, why not treat yourself? Immerse yourself in the world of scents and let each shower uplift your spirit!
As the Editor in Chief, Hyperosmia plays a pivotal role in shaping the content and direction of Aroma Oil Diffusers. With a discerning eye for detail and a passion for research, Hyperosmia ensures that our articles, guides, and resources are informative, accurate, and engaging. Through meticulously curated content, Hyperosmia strives to educate our readers on the latest trends, techniques, and benefits of aromatherapy.
Aroma Diffuser
The Ultimate Guide to Cleaning Your Aroma Diffuser: Keep It Fresh and Effective!
Navigate the essential steps to clean your aroma diffuser effectively; discover the secret to maintaining delightful scents in your home!
Cleaning your aroma diffuser regularly keeps it fresh and effective. Aim to clean it every 1-2 weeks, especially if you use it daily. Start by unplugging the device and emptying any remaining water and oils. Mix equal parts vinegar and water to wipe down the interior and use rubbing alcohol on the ultrasonic chip with a cotton swab. Rinse thoroughly with distilled water and clean the exterior with a damp cloth. Allow all components to dry completely before reassembling. With proper care, you'll enjoy delightful scents without unpleasant odors—stick around to discover more tips for keeping your diffuser in top shape!
Key Takeaways
- Clean your aroma diffuser every 1-2 weeks to prevent oil buildup and maintain optimal performance.
- Use a vinegar and water mixture for interior cleaning, and rinse with distilled water to avoid mineral deposits.
- Regularly check and clean the ultrasonic chip with rubbing alcohol to ensure efficient scent production.
- Inspect and clean the exterior with a damp cloth to prevent unpleasant odors and keep the device looking fresh.
- Troubleshoot issues like weak aroma or leaks by ensuring thorough cleaning and checking for blockages or damaged seals.
Importance of Regular Cleaning
Regular cleaning is essential for your aroma diffuser to function at its finest. When you use your essential oil diffuser, oils and residue can accumulate, potentially clogging the ultrasonic disk. This buildup diminishes its performance and efficiency over time, affecting your overall aromatherapy experience.
By practicing proper cleaning, you not only maintain ideal scent diffusion but also prevent unpleasant odors that can arise from neglected maintenance. Regular cleaning enhances your diffuser's longevity, ensuring it operates quietly and effectively.
Plus, adhering to a consistent cleaning routine helps you avoid costly repairs or replacements due to permanent damage caused by residue. Additionally, maintaining a clean diffuser can improve air quality, similar to how air purifiers reduce pollutants and enhance the overall environment. So, take the time to clean your diffuser regularly and enjoy the full benefits of your favorite oils!
Recommended Cleaning Frequency
To keep your aroma diffuser performing well, it's important to establish a cleaning routine that matches how often you use it. For regular usage, aim to clean your diffuser every 1-2 weeks. This frequency helps maintain peak performance and fragrance quality.
If you're using it less often, try to clean it at least four times a year to prevent buildup in the water reservoir. Adjust your cleaning schedule based on how intensively you use the diffuser; heavier usage might require more frequent cleanings.
Monthly deep cleaning is also advisable to tackle stubborn residues. Always consult your specific unit's manual for tailored cleaning instructions to guarantee you're following the best practices for your diffuser model.
Step-by-Step Cleaning Process
Cleaning your aroma diffuser doesn't have to be a hassle. Start by unplugging it and emptying any remaining water and essential oils from the water reservoir.
Use a soft cloth or paper towel with a mixture of one teaspoon of vinegar and two to three teaspoons of water to wipe the interior, breaking down any accumulated oils and residues.
For ultrasonic diffusers, gently clean the ultrasonic chip with a cotton swab dipped in rubbing alcohol to remove buildup.
Rinse the reservoir thoroughly with distilled water to eliminate cleaning solution residues before refilling with essential oils.
Finally, allow all components to dry completely before reassembling the diffuser to guarantee peak performance and prevent damage.
Cleaning Supplies Needed
To clean your aroma diffuser effectively, you'll need a few essential supplies.
Soft cloths or paper towels will protect its surfaces, while Q-tips help you reach those tricky spots.
Don't forget to stock up on safe cleaning solutions like distilled water and white vinegar for a thorough clean.
Essential Cleaning Tools
A well-stocked cleaning kit is key to maintaining your aroma diffuser's performance and longevity. Essential cleaning tools include soft cloths or paper towels, which prevent scratches while you clean.
You should also have Q-tips on hand; they're perfect for reaching those hard-to-access areas within your diffuser. For rinsing the reservoir, distilled water is recommended to avoid impurities that could affect performance.
White vinegar serves as a natural cleaning agent, breaking down oil buildup and keeping your diffuser fresh. Finally, rubbing alcohol is effective for disinfecting and tackling tough stains, especially in electric diffusers.
With these tools in your cleaning arsenal, you'll guarantee your diffuser stays clean, functional, and ready to fill your space with delightful aromas.
Safe Cleaning Solutions
Maintaining your aroma diffuser goes beyond just having the right tools; it also involves knowing which cleaning solutions are safe and effective. Here's a handy table for your reference:
Cleaning Solution | Purpose | Application |
---|---|---|
Soft Cloths | Prevent scratches | Wipe down the exterior |
White Vinegar | Natural cleaning agent | Breaks down oil residue |
Distilled Water | Rinsing | Clean the reservoir |
Cotton Swabs | Hard-to-reach areas | Clean around ultrasonic chip |
Rubbing Alcohol | Disinfect and remove stains | Use cautiously in electric diffusers |
Troubleshooting Common Issues
Sometimes, you might encounter issues with your aroma diffuser that can impact its performance. If you notice insufficient scent production, it could mean you need to refill your essential oils or replace the reeds in reed diffusers.
On the other hand, if the scent is too strong, simply reduce the amount of oil used. Make sure your diffuser is plugged in properly to avoid any operational issues.
If it's bubbling but not producing vapor, check the water level against the fill line and inspect the disc for damage.
Regular cleaning and maintenance can help prevent these common issues, ensuring your diffuser runs smoothly and effectively according to the manufacturer instructions.
Tips for Optimal Maintenance
To keep your aroma diffuser in prime condition, establish a regular cleaning schedule every 1-2 weeks.
Make certain you have the right supplies, like white vinegar and water, to tackle any buildup effectively.
Regular Cleaning Schedule
Cleaning your aroma diffuser every 1-2 weeks is essential for best performance. Establishing a regular cleaning schedule helps maintain the quality of your essential oils and prevents oil residues from impacting functionality. Additionally, keeping your diffuser clean can help reduce the risk of ear pressure that may arise from poor air quality in your environment. Adjust the frequency based on usage intensity; if you use your diffuser frequently, weekly cleanings may be necessary. Seasonal changes can also dictate your cleaning intervals, especially during winter months when diffusing is popular. Always consult your instruction manual for specific recommendations tailored to your unit. Maintaining cleanliness is crucial, as cleaning filters regularly can enhance the efficiency of devices that operate similarly.
Usage Frequency | Recommended Cleaning Schedule | Notes |
---|---|---|
Daily Use | Every week | Prevents buildup of residues |
Moderate Use | Every 1-2 weeks | Maintains scent quality |
Infrequent Use | At least 4 times a year | Guarantees longevity and performance |
Proper Cleaning Supplies
Using the right cleaning supplies is essential for maintaining your aroma diffuser's efficiency and longevity.
Start with soft cloths or paper towels to gently clean the surfaces without scratching. For those hard-to-reach areas, Q-tips or cotton swabs work wonders. Regular cleaning helps in reducing skin infections and irritations, ensuring a healthier environment for your aromatic experience.
When rinsing the reservoir, opt for distilled water, as it's free from impurities that could disrupt performance.
White vinegar is your go-to natural cleaner; it effectively breaks down oil buildup without harmful chemicals.
For tougher stains, rubbing alcohol is excellent for disinfecting and ensuring thorough sanitation, especially in electric diffusers. Additionally, incorporating nutrient-rich breakfasts can enhance your overall well-being, making it easier to maintain a cleaning routine.
Frequently Asked Questions
What Is the Best Way to Clean an Aroma Diffuser?
To clean your aroma diffuser effectively, start by unplugging it and emptying any leftover water and oils.
Wipe the interior with a soft cloth soaked in a vinegar-water solution.
For deeper cleaning, run a mix of one teaspoon of white vinegar with two to three teaspoons of water in the diffuser for about 30 minutes.
Don't forget to clean the ultrasonic disk with rubbing alcohol using a cotton swab for ideal performance.
How Can I Make My Aroma Diffuser Last Longer?
If you want to make your aroma diffuser last longer, you've got to treat it like gold.
Start by cleaning it every 1-2 weeks to prevent residue buildup. Use a vinegar-water mix for deep cleaning at least once a month.
Always unplug it before cleaning to avoid damage. Stick to low-viscosity essential oils to keep the ultrasonic disk clear.
Following these tips will keep your diffuser running smoothly for years to come!
How Does Vinegar Clean a Diffuser?
Vinegar cleans your diffuser by breaking down oil residue and mineral buildup thanks to its acidic properties.
When you mix one teaspoon of white vinegar with two to three teaspoons of water and run it in your diffuser for about 30 minutes, it effectively cleans the internal components.
This not only removes unpleasant odors but also leaves your diffuser fresh for the next use.
Just remember to rinse it afterward to eliminate any vinegar scent!
How to Get Mildew Smell Out of a Diffuser?
To get mildew smell out of your diffuser, start by unplugging it and emptying any remaining water.
Mix one teaspoon of white vinegar with two teaspoons of water, and run this solution in the diffuser for about 30 minutes.
After that, rinse the reservoir with distilled water to remove any vinegar.
Finally, use a cotton swab dipped in rubbing alcohol to clean the ultrasonic disk, ensuring it's free of stubborn mildew.
Regular maintenance helps prevent future smells.
Conclusion
In a world where even your grandma knew the importance of a fresh scent, keeping your aroma diffuser clean is vital for its performance and longevity. By sticking to a regular cleaning routine, you'll guarantee your space remains inviting and your diffuser works like a charm. Remember, a little maintenance goes a long way! So, grab those cleaning supplies and give your diffuser the care it deserves—your senses will thank you!
As the Editor in Chief, Hyperosmia plays a pivotal role in shaping the content and direction of Aroma Oil Diffusers. With a discerning eye for detail and a passion for research, Hyperosmia ensures that our articles, guides, and resources are informative, accurate, and engaging. Through meticulously curated content, Hyperosmia strives to educate our readers on the latest trends, techniques, and benefits of aromatherapy.
Aroma Diffuser
How to Modify an Aromatherapy Diffuser: Customization Made Simple!
Customize your aromatherapy diffuser for a unique scent experience that transforms your space; discover the simple steps to elevate your relaxation today!
Modifying your aromatherapy diffuser lets you personalize your scent experience. Start by selecting the right essential oils based on the mood you want to create. Blend oils, like lavender and chamomile, for a calming effect using a good ratio—1 drop base, 3 drops middle, and 1 drop top note. Tweak these amounts to find your perfect strength. Don't forget to maintain your diffuser by cleaning it every few uses. You can also explore various technologies, like cold-air nebulizing, to enhance aroma diffusion. Keep experimenting and you'll discover endless possibilities for a customized experience!
Key Takeaways
- Adjust Scent Intensity: Utilize customizable features on your diffuser to control the strength of the aroma based on your preference.
- Experiment with Oil Blends: Combine various essential oils to create unique blends that suit your mood or seasonal themes.
- Vary Diffusing Time: Use scheduling options to alternate between different oils or adjust duration for a changing scent experience.
- Optimize Diffuser Placement: Position your diffuser in different areas to see how scent dispersal varies throughout your space.
- Regular Maintenance: Clean your diffuser every 3-5 uses to ensure optimal performance and prevent oil buildup.
Understanding Diffuser Technology
When exploring aromatherapy, understanding diffuser technology is crucial because it influences your overall experience.
Different types of diffusers, like ultrasonic diffusers and cold-air nebulizing models, offer unique benefits for distributing essential oils. Ultrasonic diffusers create a fine mist by using water and ultrasonic vibrations, while cold-air nebulizing diffusers break down essential oils into a concentrated mist without water or heat.
This technology preserves the integrity of essential oils, providing a potent scent experience and maximizing therapeutic benefits. Many modern diffusers also come with customizable features, such as adjustable scent intensity and scheduling options, which enhance your aromatherapy experience. Additionally, using essential oils with natural antibacterial properties can further improve the atmosphere in your space.
Knowing the type of diffuser you're using can considerably affect scent strength and dispersal area, making this understanding crucial.
Choosing the Right Essential Oils
When you're choosing essential oils for your diffuser, think about the aromatic profiles that suit your mood or the season. Understanding blending techniques can help you create a harmonious mix, while seasonal oil recommendations can enhance your ambiance year-round. For instance, combining lavender and chamomile can promote relaxation benefits that elevate your overall experience. Additionally, considering the anti-inflammatory properties of certain oils can further enhance the therapeutic effects of your blends. The use of citrus scents like orange and lemon can also uplift your mood, making them perfect for a refreshing atmosphere. Moreover, some essential oils, such as lavender oil, are known to have calming effects that can help reduce anxiety and improve sleep quality.
Selecting Aromatic Profiles
Choosing the right essential oils can greatly enhance your aromatherapy experience, as each oil offers unique benefits and scents.
When selecting aromatic profiles, think about the effects you want to achieve. Consider these scent profiles:
- Calming: Lavender—perfect for relaxation.
- Energizing: Peppermint—invigorates your space.
- Uplifting: Citrus oils—like Lemon, brighten your mood. Incorporating herbal alternatives can also provide additional calming effects, as certain herbal teas, like chamomile tea, may promote relaxation and improve sleep quality. Additionally, oils like eucalyptus oil can enhance respiratory function, making them a great choice for invigorating blends.
Experimenting with essential oil combinations can lead to delightful blends.
For instance, mix Lavender with Bergamot for a soothing atmosphere or Lemon with Rosemary for an energizing touch.
To create balanced aromas, remember the recommended blending ratio: 1 drop of base note oils, 3 drops of middle notes, and 1 drop of top notes. Proper steeping time for your chosen tea can also influence the overall ambiance and effectiveness of your aromatherapy experience.
Document your blends to refine your skills in customizing aromatic profiles!
Blending Techniques Explained
To achieve the perfect blend of essential oils for your aromatherapy diffuser, understanding blending techniques is crucial.
Start by categorizing your oils by their effects, like calming or energizing, and their scent profiles, such as floral or citrus. A great blending ratio is 1 drop of base note, 3 drops of middle note, and 1 drop of top note for balanced essential oil blends.
Don't hesitate to experiment—try pairing energizing oils like Peppermint with calming oils like Lavender for unique diffuser blends. Document your successful combinations and label them to track ingredients and effects over time.
Finally, conduct scent tests with open bottles or cotton swabs to verify your chosen oils work harmoniously before finalizing your blend.
Seasonal Oil Recommendations
As the seasons change, so does the opportunity to enhance your space with the right essential oils. Customizing your aromatherapy diffuser with seasonal oil recommendations can elevate the ambiance and evoke nostalgic feelings.
Here are three essential oils to contemplate:
- Spring: Roman Chamomile and Geranium for renewal and freshness.
- Summer: Lemon and Grapefruit to uplift and energize your warm days.
- Autumn: Cedarwood and Cinnamon to bring cozy, spicy warmth.
For winter, choose grounding oils like Frankincense and warm scents such as Clove. Aromatherapy can enhance mood and each of these fragrance oils not only transforms your environment but also helps set the mood appropriate to the season. Embrace the power of essential oils to create a welcoming atmosphere year-round!
Creating Custom Oil Blends
Creating custom oil blends for your aromatherapy diffuser can be a rewarding and enjoyable experience.
Start by categorizing essential oils based on their effects, like calming or energizing, and their scent profiles, such as floral or citrus. Utilizing oils that align with your desired state can enhance your vibrational energy, further promoting relaxation and well-being.
For a balanced blend, follow the recommended ratio: 1 drop of base note, 3 drops of middle note, and 1 drop of top note.
Experiment with different combinations—pair citrus oils with grounding oils for a unique aromatic profile.
Document your successful blends and label them to track ingredients and their effects.
Before committing to larger quantities, conduct scent tests using cotton swabs or open bottles to refine your blend, ensuring the final product meets your expectations.
Additionally, it's important to dilute oils significantly before using them in your diffuser to ensure safety and prevent overwhelming scents.
Happy blending!
Techniques for Optimal Scent Balance
To find the perfect scent balance, start with a basic ratio of 1 drop of base note, 3 drops of middle note, and 1 drop of top note.
You can tweak these amounts based on how strong you want the scent to be.
Remember to reflect on how the oils interact and adjust accordingly for a blend that truly resonates with you.
Ratio of Essential Oils
Finding the perfect balance in your essential oil blend can transform your aromatherapy experience. To achieve an ideal scent, pay attention to the ratio of essential oils. A common starting point is:
- 1 drop of base note – it lingers, providing a lasting foundation.
- 3 drops of middle note – these balance the blend, adding warmth and depth.
- 1 drop of top note – they evaporate quickly, adding freshness and brightness.
Using 3-5 different oils per blend guarantees a well-rounded aroma. Incorporating predictive modeling may help you understand which blends resonate best with your personal preferences over time. Additionally, consider using oils like rooibos or its unique varieties to add a soothing and earthy undertone to your blend. The use of adaptogenic herbs can further enhance your overall wellness, creating a more enriching atmosphere.
Remember, strong-scented oils should be added sparingly, typically limiting them to one or two drops. Regularly incorporating calming oils can also help reduce cortisol levels, contributing to a more tranquil atmosphere.
Scent Strength Adjustments
Achieving the right scent strength in your aromatherapy diffuser can elevate your experience considerably. Start by experimenting with the number of drops of essential oils, adjusting ratios based on your scent preferences. Use fewer drops for stronger oils to prevent overwhelming aromas.
Conduct smell tests by sniffing oil bottle caps for a better sense of strength before finalizing your blend. If the scent's too strong, consider using a carrier oil for dilution or try intermittent diffusing. Regularly assess your diffuser settings, like intensity and timing, to maintain a balanced aroma throughout your space. Additionally, certain essential oils like lavender oil are widely recognized for their calming effects, making them ideal for relaxation when diffused.
Here's a quick reference table to help you:
Essential Oil | Recommended Drops | Strength Level |
---|---|---|
Lavender | 3 | Mild |
Peppermint | 2 | Strong |
Lemon | 4 | Moderate |
Eucalyptus | 1 | Very Strong |
Tea Tree | 2 | Moderate |
Maintaining Your Diffuser
While enjoying the soothing scents of your aromatherapy diffuser, it's crucial to keep it well-maintained to guarantee peak performance.
Regular cleaning not only enhances the quality of aromas but also extends your diffuser's longevity. Air purifiers can also improve indoor air quality by eliminating odors, which complements the use of an aromatherapy diffuser.
Follow these simple maintenance tips:
- Clean every 3-5 uses: Use a mixture of water and vinegar or rubbing alcohol to prevent residue build-up.
- Disassemble carefully: Follow the manufacturer's instructions to guarantee thorough cleaning without damaging any parts.
- Check essential oils: Replace any that have become rancid or lost their fragrance strength. Additionally, ensure that your diffuser is free of unusual noises that may indicate mechanical issues.
Enhancing Aroma Diffusion
Enhancing the aroma diffusion experience can transform your space into a soothing sanctuary.
To achieve this, consider using cold-air nebulizing technology, which preserves the integrity of essential oils without heat or water. Customizable features like scent intensity control and scheduling options let you tailor your aroma diffusion to fit your preferences.
If you're using reed diffusers, regularly flip the reeds to refresh the scent, and replace saturated reeds to maintain aroma strength.
For a balanced aroma profile, blend essential oils with a mix of top, middle, and base notes.
Finally, choose a glass or ceramic container with a narrow opening for your reed diffusers, slowing evaporation and optimizing scent distribution throughout your environment.
User Experiences and Tips
What if you could elevate your aromatherapy experience by learning from others? Users have shared valuable tips that can really enhance your diffuser setup.
Here are three to take into account:
- Start with 3-5 essential oils in your blends to find your favorite oils without overwhelming scents.
- Flip the reeds in your homemade reed diffusers weekly to maintain a stronger scent and prolong the aroma's effectiveness.
- Document your successful blends to easily recreate those cherished scents, making your space feel uniquely yours.
Experimenting with different combinations can combat specific odors, so don't hesitate to try new blends.
Engaging with the community can also provide fresh insights and inspire your aromatherapy journey!
Additional Resources and Community Support
Connecting with additional resources and community support can considerably enhance your aromatherapy journey.
You'll find easy DIY recipes that let you experiment with essential oil combinations tailored to your preferences. Seasonal ideas can spark creativity, making blend creation a fun project for families during holidays. Additionally, exploring the benefits of dietary fiber can inspire you to incorporate healthy habits into your lifestyle.
Stay updated with blog posts featuring new diffuser blend ideas, and don't hesitate to reach out for customer support if you have questions about customization options for your diffuser.
Engaging on social media also fosters a sense of community among essential oil enthusiasts, where you can share experiences, tips, and favorite blends. Additionally, exploring eco-friendly materials for your diffuser can contribute to a more sustainable aromatherapy practice.
With these resources at your fingertips, you'll feel empowered to explore the art of aromatherapy fully.
Frequently Asked Questions
Can You Add Anything to a Diffuser?
You can definitely add various things to a diffuser, but it's important to choose wisely.
Pure essential oils are your best bet; they maintain therapeutic benefits. You might also consider adding a carrier oil to help with diffusion, but steer clear of heavy oils that can clog the device.
Blending different oils can create a customized scent, so experiment with your favorites to find the perfect balance that suits your mood and environment!
How to Make Your Own Diffuser Blend?
To make your own diffuser blend, start by categorizing essential oils based on their effects, like calming or energizing.
Use a ratio of 1 drop of base note, 3 drops of middle note, and 1 drop of top note for balance.
Experiment with combinations and document successful blends for future use.
Conduct scent tests with open bottles to see how they interact before finalizing your blend for a truly personalized experience.
How Do You Improvise a Diffuser?
If you need to improvise a diffuser, try using a small bowl of water mixed with your favorite essential oils. As the water evaporates, the scent will fill the air.
Alternatively, soak cotton balls in essential oils and place them in a jar for gradual aroma release.
You can also use a ceramic container with carrier oil and bamboo skewers, or simply add oils to simmering water on the stove for a quick scent boost.
Can You Put Vanilla Extract in a Diffuser?
You shouldn't put vanilla extract in your diffuser.
While it might smell great, vanilla extract often contains alcohol and other additives that can damage your diffuser, especially ultrasonic models.
Instead, opt for pure vanilla essential oil or a specifically formulated vanilla fragrance oil designed for diffusers.
If you're feeling crafty, you can also try making a homemade reed diffuser using vanilla essential oil and a carrier oil for a natural scent alternative.
Conclusion
To sum up, customizing your aromatherapy diffuser can transform your space into a serene sanctuary. With the right oils and blends, you'll create mesmerizing combinations that uplift your spirit and soothe your soul. Remember, maintaining your diffuser is key to maximizing its magic. Embrace the enchanting experience of aroma diffusion, and don't hesitate to share your fragrant findings with fellow enthusiasts. Together, you can cultivate a community of comfort and creativity, spreading joy through the power of scent!
As the Editor in Chief, Hyperosmia plays a pivotal role in shaping the content and direction of Aroma Oil Diffusers. With a discerning eye for detail and a passion for research, Hyperosmia ensures that our articles, guides, and resources are informative, accurate, and engaging. Through meticulously curated content, Hyperosmia strives to educate our readers on the latest trends, techniques, and benefits of aromatherapy.
-
Essential Oils3 days ago
How to Use Mainstays Aromatherapy Essential Oils: Transform Your Home With Ease!
-
Essential Oils3 days ago
Cleansing Essential Oils: Purify Your Mind, Body, and Space!
-
Essential Oils3 days ago
Essential Oils to Get Rid of Skunk Smell in Your House: A Miracle Solution!
-
Essential Oils3 days ago
How to Dispose of Essential Oils Safely: Protect Your Health and Environment!
-
Beginners Guides1 day ago
How Long Are Aromatherapy Sessions? What You Need to Know!
-
Beginners Guides1 day ago
How to Make an Aromatherapy Rice Bag: Cozy Comfort Made Simple!
-
Essential Oils3 days ago
How to Use Glycerin in Aromatherapy: Enhance Your Scents Naturally!
-
Vetted3 days ago
7 Best Budget-Friendly Aroma Products for Beginners: Affordable Ways to Enhance Your Space