Aroma Diffuser
How to Make Microwavable Aromatherapy Bean Bags: DIY Relaxation!
Make your own soothing aromatherapy bean bags for relaxation and discover secrets to enhance their calming effects! Keep reading to learn more.
You can create your own soothing microwavable aromatherapy bean bags to melt away stress and tension. Start by cutting two rectangles of 100% cotton fabric. Pin them together and sew three edges, leaving an opening. Fill the bag with 6 cups of uncooked rice or an alternative, and add your favorite essential oils for that relaxing scent. Seal it up, then heat in the microwave for 90 seconds to 2 minutes. Apply it to sore muscles for relief. If you stick around a bit longer, you'll uncover tips on maintaining and enhancing your bean bag's effectiveness!
Key Takeaways
- Use 100% cotton fabric, uncooked rice or alternatives, and essential oils for a safe and effective bean bag.
- Infuse rice with essential oils in a sealable container for 4 days to 3 weeks for optimal scent.
- Cut fabric, sew three edges, fill leaving space, and top stitch to secure and enhance durability.
- Heat bean bag in the microwave for 90 seconds to 2 minutes, monitoring for safety and effectiveness.
- Regularly check for damage, refresh filling or oils, and maintain proper care for long-lasting use.
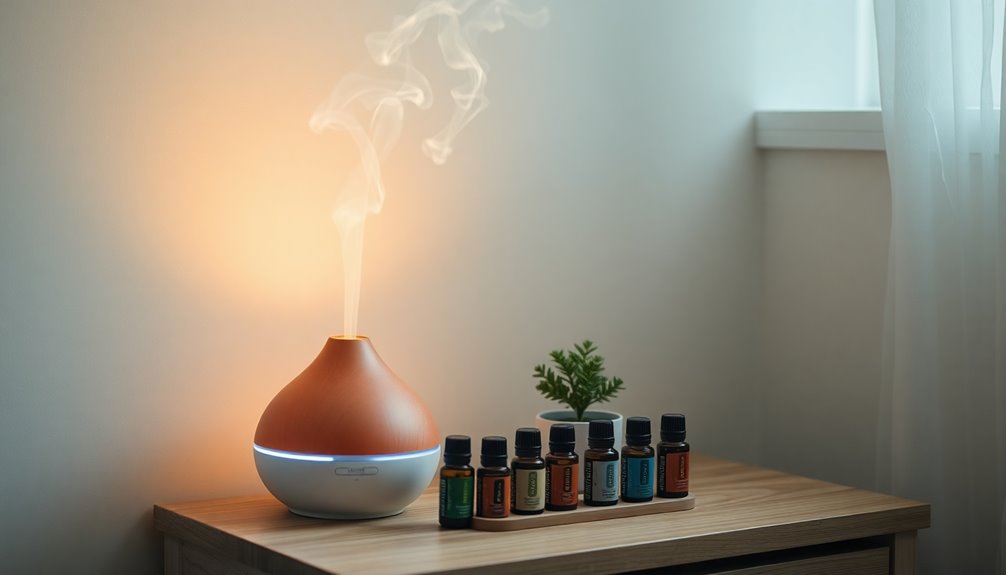
Benefits of Aromatherapy Bean Bags
Aromatherapy bean bags offer a unique blend of comfort and therapeutic benefits, making them an ideal choice for anyone seeking natural relief from muscle tension.
By combining the soothing effects of heat with calming essential oils like lavender and peppermint, you can experience deep relaxation. Research shows that pleasant scents can lead to increased feelings of happiness and well-being, enhancing the overall experience. Additionally, using essential oils such as lavender oil can further amplify the calming effects, promoting an even greater sense of tranquility. Regular use of these oils can stimulate hair follicles and contribute to overall health.
These bean bags aren't only a cost-effective alternative to commercial heating pads but also allow you to customize their size, shape, and scent to match your preferences.
The gentle heat promotes relaxation, easing stress and discomfort from conditions such as arthritis or menstrual cramps.
As the heat releases the essential oils' fragrances, you'll enhance both your physical and mental well-being, turning your self-care routine into a truly rejuvenating experience. Regular use of these bean bags can enhance mobility and comfort through the therapeutic properties of essential oils.
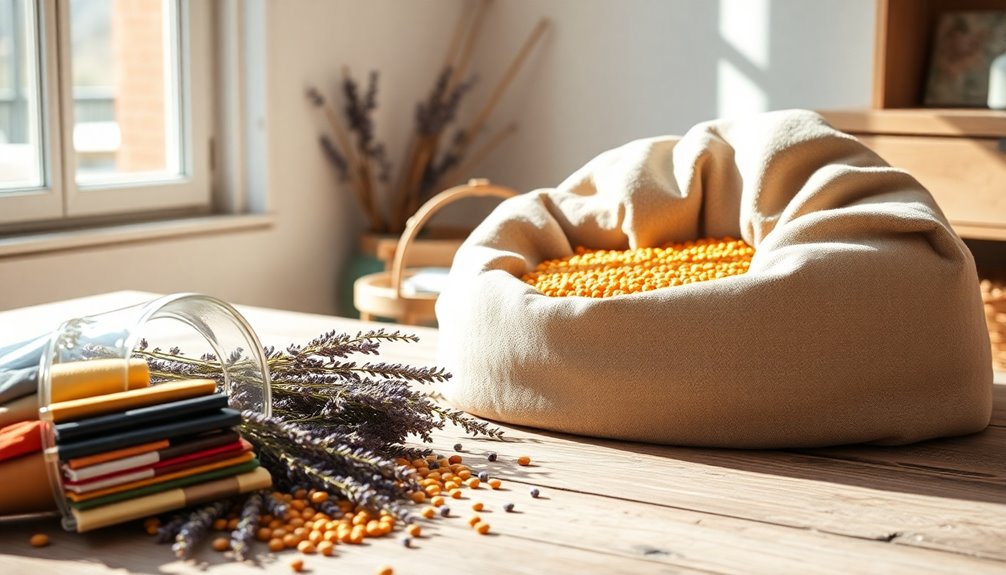
Required Materials
To create your own aromatherapy bean bag, you'll need a few specific materials that guarantee both functionality and safety.
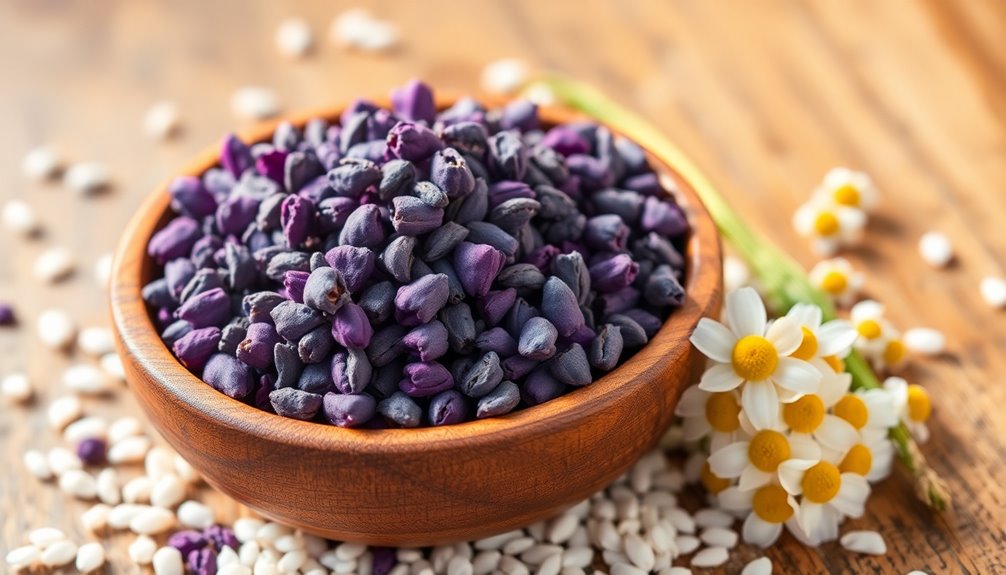
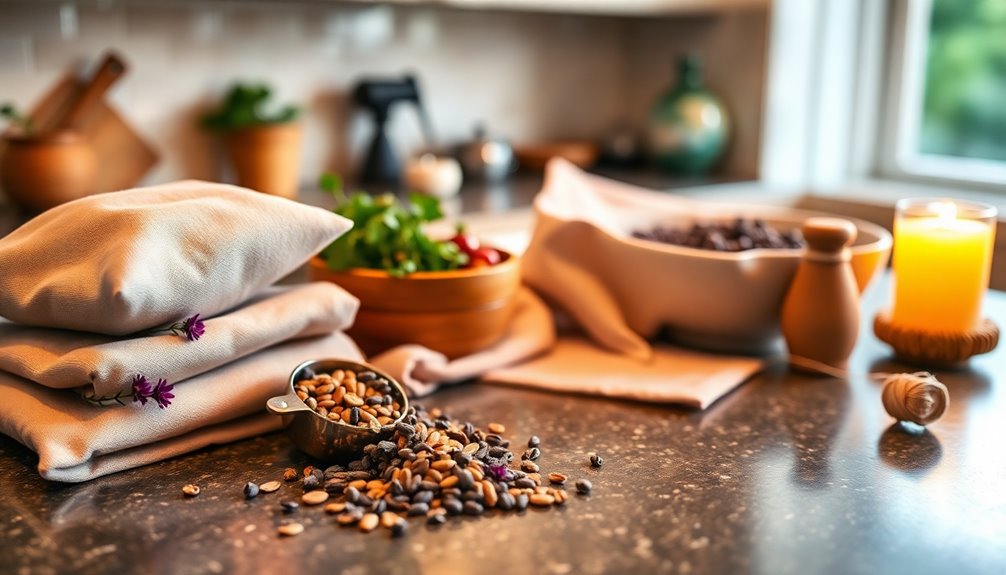
Start with a fat quarter of 100% cotton fabric, ensuring it's safe for microwave use. For filling, gather approximately 6 cups of uncooked rice, or consider alternatives like dried beans, flaxseed, or whole corn, all of which provide excellent heat retention.
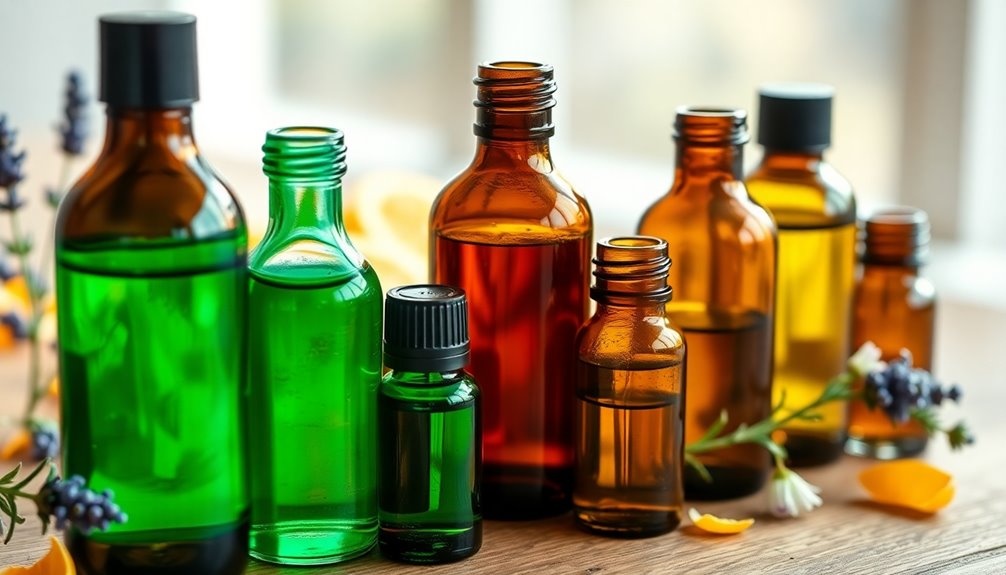
Essential oils like lavender or peppermint will enhance your therapeutic experience; add about 10-20 drops to the rice.
You'll also need basic sewing supplies: a needle, 100% cotton thread, scissors, and optionally, a funnel for easier filling.
Finally, a sealable container is handy for mixing and infusing the rice with essential oils before you fill your heating pad.
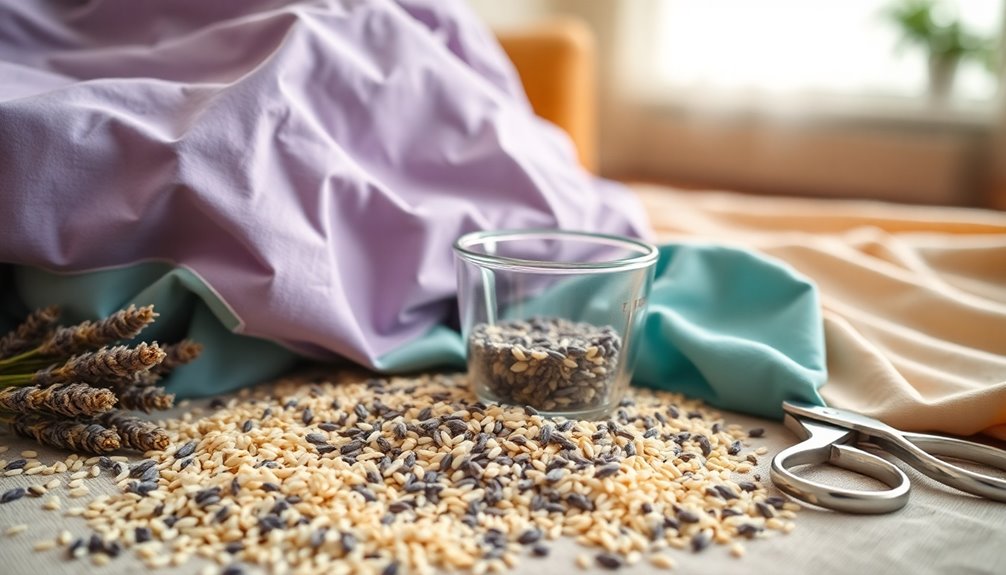
Filling Preparation
To create your perfect aromatherapy bean bag, start by combining uncooked rice with your chosen essential oils in a sealable bag.
Let it sit for anywhere between 4 days to 3 weeks to really let those scents infuse.
You can tweak the intensity of the aroma to match your personal preferences, ensuring a cozy and calming experience every time.
Scent Infusion Techniques
While preparing the filling for your DIY aromatherapy bean bags, combining uncooked rice with your chosen essential oils in a sealable bag is essential for achieving a rich scent infusion.
To get the best results, let the mixture marinate for 4 days to 3 weeks, allowing the rice bags to absorb the aromatic properties fully. Essential oils provide natural antibacterial and antifungal properties, enhancing the therapeutic effects of your bean bags. Using oils like lavender oil, which is known for its calming effects, can significantly enhance your relaxation experience. It's important to remember that certain oils may be toxic to pets, so ensure safety when using your creations around furry friends.
Experiment with different essential oils, like lavender or peppermint, to customize the therapeutic benefits according to your preferences. Certain scents like lavender and chamomile promote relaxation and calmness.
Remember, essential oil scents may dissipate after heating, so adding a few extra drops before each use can refresh the aroma.
Avoid using fresh peels or fabric paints, as these materials aren't safe for microwave heating and could cause unwanted reactions.
Happy crafting!
Filling Mixture Storage
Storing your filling mixture properly is essential for keeping the aroma fresh and potent.
After you've combined uncooked rice with essential oils in a sealable bag, let the mixture infuse for 4 days to 3 weeks. The longer you allow the infusion, the stronger the scent will be. Additionally, using a blend of harmonious combinations can enhance the overall fragrance experience. The high fiber content of rice also helps absorb excess moisture, maintaining the integrity of your mixture.
Once it's ready, store the mixture in a cool, dry place to prevent unwanted odors.
Remember that essential oils can dissipate after heating, so you might want to add more oil before each use to enhance the aroma.
Regularly check your filling for moisture or spoilage, and refresh it with new rice or essential oils as needed to maintain its effectiveness and fragrance. Additionally, keeping your aromatherapy bean bags away from direct sunlight can help preserve the integrity of the essential oils used.
Adjusting Scent Intensity
Adjusting the scent intensity of your aromatherapy bean bags is a straightforward process that lets you tailor the fragrance to your liking.
Start by combining uncooked rice with your chosen essential oils in a sealable bag. Let the mixture marinate for anywhere from 4 days to 3 weeks—this will enhance the scent intensity based on your preference. The longer the rice sits with the oils, the more infused the aroma becomes.
After marination, if you want an even stronger scent, simply add more essential oils directly before sealing the bag.
Sewing Instructions
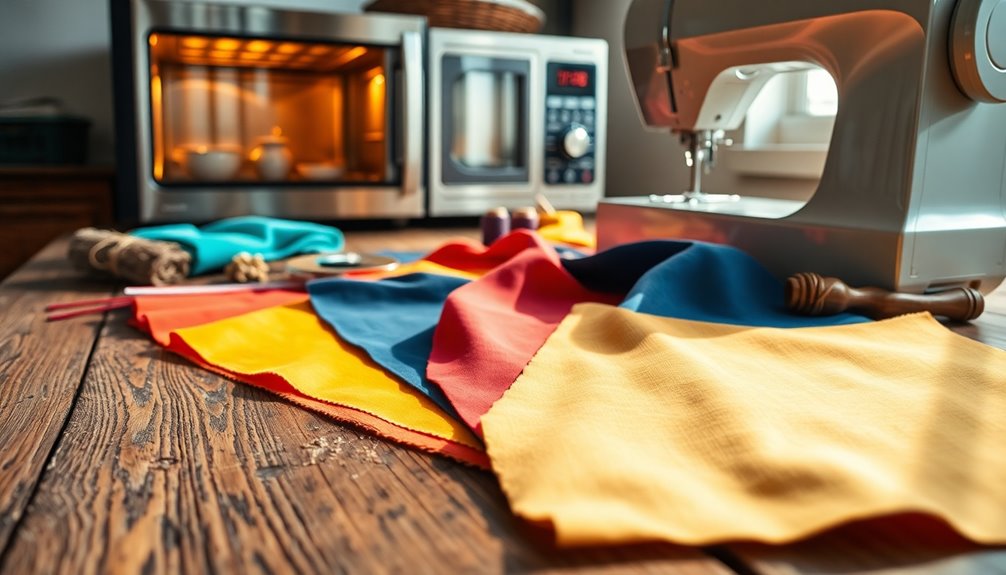
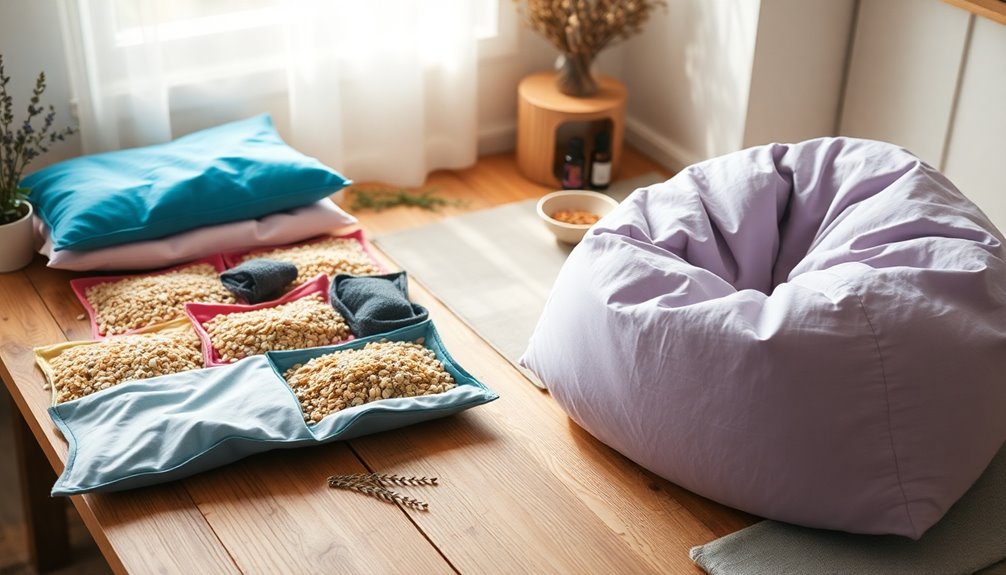
To create your DIY aromatherapy bean bags, you'll start by cutting two rectangles of 100% cotton fabric to your desired dimensions, leaving a 3-4 cm gap on one edge for filling.
Pin the right sides of the fabric together and sew around three edges using a sewing machine, with a seam allowance of 0.5 cm to 1 cm, ensuring the gap remains accessible.
Once sewn, turn the fabric right side out through the gap and press the seams flat.
Now it's time to fill the bag with your chosen filler, like rice or beans, leaving about 1/3 empty for flexibility.
For a neat finish, top stitch around the edges after filling to securely close the bag, enhancing its durability for use as heating pads.
Final Assembly Steps
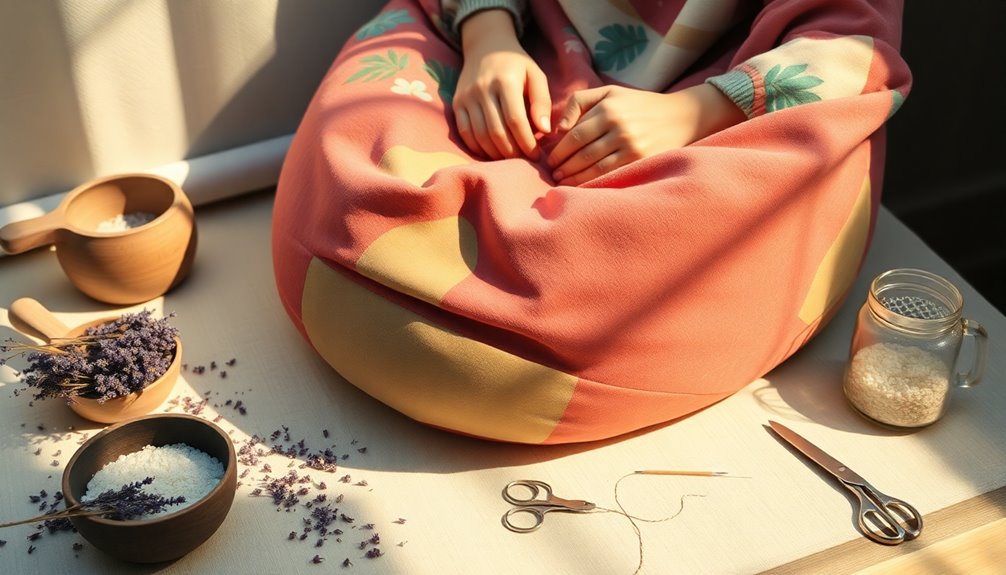
Once you've filled your bean bag, fold the open edge inward and pin it closed to keep the filling secure.
For the final assembly, use a slip stitch or top stitch to securely close the opening, guaranteeing it remains intact for future use. If you want added durability, reinforce the seams with double stitching, especially if you plan to heat it in the microwave frequently.
To personalize your creation, consider decorating the cotton material with contrasting thread for a unique touch.
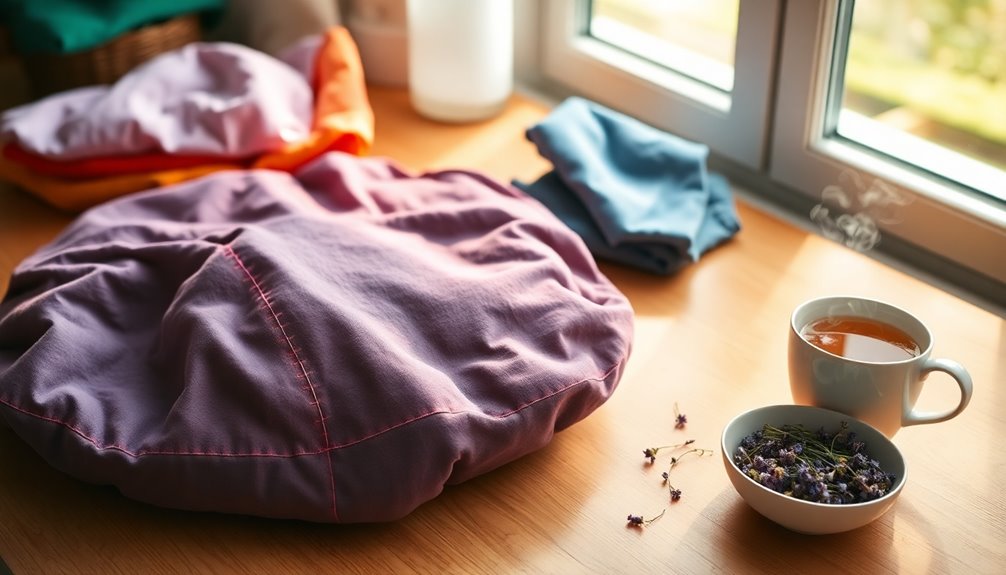
Once completed, allow the bag to cool completely before reheating, and always monitor the heating times to guarantee safety.
With these steps, your aromatherapy bean bag is ready to help you relax with your favorite essential oils!
Heating Guidelines
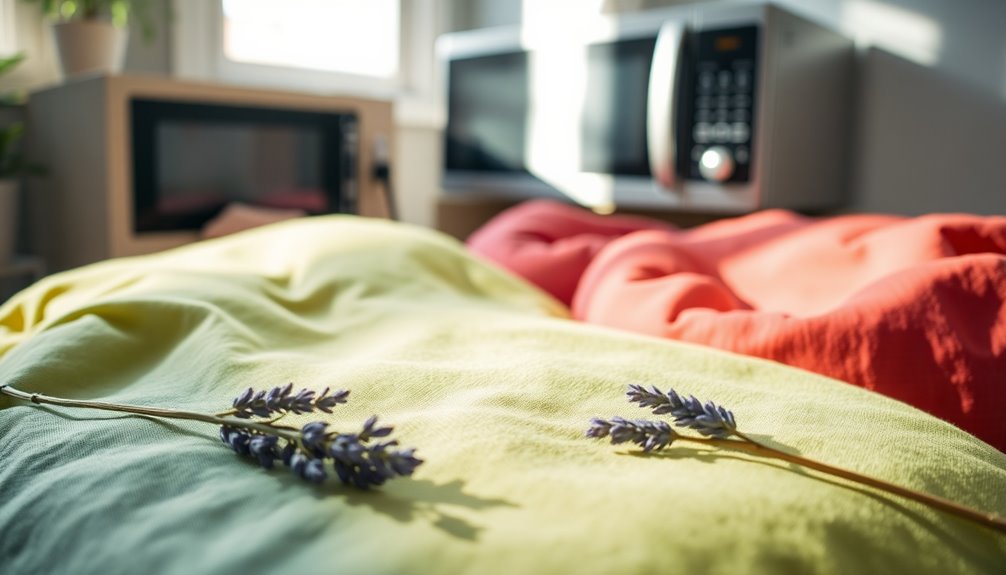
When you're ready to heat your aromatherapy bean bag, keep in mind that the microwave heating time usually ranges from 90 seconds to 2 minutes, depending on its size and the type of filler used. To guarantee safe and effective heating, follow these guidelines:
Size of Bean Bag | Heating Time |
---|---|
Small | 90 seconds |
Medium | 1.5 minutes |
Large | 2 minutes |
Always test the temperature on your skin before using it; it should be warm but not too hot. Placing a mug of water in the microwave alongside the bean bag can prevent overheating. Remember to allow it to cool completely between uses to maintain its effectiveness and prevent hazards.
Usage Tips
Using your aromatherapy bean bag effectively can enhance your relaxation experience considerably.
Start by heating the bag in the microwave for 90 seconds to 2 minutes, but always test the temperature to avoid burns. For ideal relief, apply the heated bag to sore muscles for about 20 minutes, allowing the heat to penetrate and soothe tension.
To elevate your aromatherapy experience, add 10-20 drops of essential oils like lavender or peppermint to the filling, letting it absorb for at least 10 minutes before use.
If you prefer a cooling effect, store the bag in the freezer for a soothing cold pack.
Regularly check for signs of wear and refresh the filling or essential oils to maintain effectiveness and fragrance.
Alternative Fillers
Finding the right filler for your aromatherapy bean bag can greatly impact its effectiveness and comfort. Flax seed is an excellent choice, as it retains heat longer thanks to its natural oils.
If you're looking for a budget-friendly option, consider feed corn; it holds heat better than traditional rice, making it perfect for extended use.
Lentils offer a unique texture and impressive heat retention properties, easily found at most stores.
While rice is common, be cautious with Minute Rice—it can become mushy and poses a fire hazard when heated.
Don't hesitate to experiment with these alternative fillers to discover what works best for you, enhancing your relaxation experience with your favorite essential oils.
Maintenance and Care
To keep your aromatherapy bean bags in top shape, regularly check for any damage and clean the fabric covers as needed.
If you notice the filling losing its scent or becoming stale, it's time to refill or refresh it. Staying on top of these maintenance tasks will guarantee your bean bags remain safe and effective for relaxation.
Cleaning Fabric Covers
Keeping your fabric covers clean is essential for maintaining the hygiene and freshness of your DIY aromatherapy bean bags.
For effective cleaning fabric covers, always choose removable cotton options, as they're easy to wash. Use cold water to prevent shrinkage and color fading, and avoid harsh detergents—gentle cycles work best to preserve fabric integrity.
If you notice any odors, you might want to replace the rice or beans inside, or add a few drops of essential oils to refresh the scent.
Regularly check for signs of wear, such as fraying or weak seams, to guarantee your heating pads remain safe and functional.
A little care goes a long way in keeping your bean bags in top shape!
Refilling and Refreshing Contents
While your DIY aromatherapy bean bags can provide soothing relief, it's important to regularly refill and refresh their contents to maintain their effectiveness and scent.
If you notice any odors after multiple uses, replace the filling with new dried rice or beans to restore freshness. You can also enhance the aroma by adding essential oils; just mix a few drops with the filler and let it absorb for an hour before refilling the bag.
For hygiene, consider creating removable fabric covers that you can wash easily.
If your bean bag develops a burnt smell after microwaving, swap out the filling entirely to avoid health hazards.
Keeping your bean bags in tip-top shape guarantees a safe and enjoyable experience.
Monitoring for Damage
Regularly checking your DIY aromatherapy bean bags for damage is essential for ensuring their longevity and effectiveness. Monitoring for damage helps you catch issues early. Look for signs of wear like fraying or tears, and inspect for unusual odors after heating. These odors can signal moisture absorption or degradation, indicating it's time for a replacement. Keep an eye on your heating time too; starting with shorter intervals can prevent overheating and burnt filling. If you find leaks or stitching breakage, reinforce the seams to extend their life. Additionally, wood pellet fireplaces are designed for efficient heating, making them a great option for maintaining the right environment for your bean bags. Periodically refresh the filling to maintain pleasant scents. Additionally, ensure that your bean bags are stored in a low humidity environment to prevent any moisture-related issues. Engaging in regular maintenance can significantly enhance the overall comfort and support provided by your bean bags. Regular maintenance also ensures that the bean bags remain free from allergens, contributing to a healthier relaxation experience.
Inspection Aspect | Signs to Look For | Action to Take |
---|---|---|
Fabric and Seams | Fraying, Tears | Repair or Replace |
Odors | Unusual Smells | Refresh Filling or Replace |
Heating Time | Overheating | Reduce Heating Intervals |
Stitching | Leaks or Breakage | Reinforce Seams |
Frequently Asked Questions
How to Make Heat Bags for Pain Relief?
To make heat bags for pain relief, you'll need two pieces of 100% cotton fabric, each measuring about 14cm x 50cm.
Fill them with uncooked rice, wheat, or flaxseed, leaving about half empty for flexibility.
Sew the pieces together, leaving a 4cm gap for turning and filling, then top stitch it closed.
Heat the bag in the microwave for 90 seconds to 2 minutes, checking the temperature to ascertain it's comfortable for use.
How to Make a Microwave Bean Bag Heating Pad?
Ever wondered how to create your own microwave bean bag heating pad?
Start by cutting two pieces of cotton fabric, about 14cm x 50cm.
With the right sides facing each other, sew three edges, leaving a gap for filling.
Next, fill it with your choice of dried rice or beans, then seal it up.
Heat it for 1-2 minutes, but remember to test the temperature before using it to avoid burns!
What Do You Fill Microwave Heating Bags With?
You can fill microwave heating bags with various materials like uncooked rice, wheat, or flax seed.
Flax seed is a great choice since it retains heat longer due to its oils. Cherry pits also work well for moist heat.
Just steer clear of Minute Rice, as it can become mushy and is flammable.
Always use 100% cotton fabric to keep everything safe while you enjoy the soothing warmth of your heating bag.
What Is the Best Fabric for a Microwave Heating Pad?
Imagine wrapping yourself in a warm, cozy blanket on a chilly evening.
For your microwave heating pad, you'll want to choose 100% cotton fabric. It won't melt and keeps you safe while heating.
Flannel's softness and heat retention feel great against your skin, while muslin is easy to wash, perfect for regular use.
Just steer clear of synthetic materials like fleece, as they can melt and release harmful fumes.
Conclusion
So, you've crafted your own aromatherapy bean bag, and you're all set for relaxation. Who knew a simple DIY project could turn your hectic life into a spa day? While you might think you're just making a cozy bag, you're actually creating a portable sanctuary. Just remember, it's not just about heating it up; it's about the joy of knowing your homemade creation is working hard to melt away your stress—while you sit back and do absolutely nothing!
As the Editor in Chief, Hyperosmia plays a pivotal role in shaping the content and direction of Aroma Oil Diffusers. With a discerning eye for detail and a passion for research, Hyperosmia ensures that our articles, guides, and resources are informative, accurate, and engaging. Through meticulously curated content, Hyperosmia strives to educate our readers on the latest trends, techniques, and benefits of aromatherapy.
Aroma Diffuser
How to Use Shower Aromatherapy Bursts: Refresh and Relax!
Master the art of rejuvenation with Shower Burst® aromatherapy tablets for a spa-like experience, and discover more tips to enhance your relaxation journey!
To use Shower Burst® aromatherapy tablets, unwrap one and place it in the provided sachet, hanging it away from direct water flow. Activate the tablet by moistening it with water and humidity, which releases the soothing essential oils. You'll enjoy invigorating scents like grapefruit and calming lavender that create a spa-like atmosphere in your shower. After your shower, let the tablet dry completely for reuse, as each one can last for about 6-8 uses. This simple routine elevates your self-care while revitalizing and relaxing you. Keep going for more tips on maximizing your aromatherapy experience!
Key Takeaways
- Unwrap a Shower Burst® tablet and place it inside the provided sachet for easy hanging in your shower.
- Hang the sachet away from direct water flow to ensure the tablet lasts longer during use.
- Activate the tablet by moistening it with water, allowing the essential oils to release their therapeutic aromas.
- After use, allow the tablet to dry completely for up to 6-8 showers, maximizing its longevity.
- Enjoy the calming effects of essential oils like Lavender and uplifting scents like Sweet Orange for a refreshing shower experience.
Product Overview
Shower Burst® tablets transform your daily shower into a rejuvenating experience with their blend of essential oils like Grapefruit, Lavender, and Sweet Orange. These all-natural ingredients are designed to activate your senses, creating a mood-boosting aromatherapy experience. Each tablet comes individually packaged in a sachet, making it easy to hang in your shower. Inhalation of essential oils promotes relaxation and reduces anxiety symptoms, enhancing your overall experience. Additionally, the use of essential oils for respiratory health can further enhance your breathing, making your shower routine even more refreshing. As the water and humidity interact with the tablet, they release therapeutic aromas that evoke a spa-like atmosphere. The Variety Pack offers four unique scents—Healing, Clarity, Relax, and Refresh—each crafted to enhance your well-being. Furthermore, studies suggest that aromatherapy can lead to increased energy levels, ensuring you feel revitalized throughout your day. The calming effects of lavender essential oil can also aid in promoting a peaceful environment during your shower. Plus, after use, these tablets can dry out for reuse in subsequent showers, ensuring you can enjoy extended relaxation and refreshment from just one tablet.
Usage Instructions
To get the most out of your Shower Burst® tablets, start by unwrapping one from its packaging.
Place the tablet in the provided sachet for easy hanging in your shower. Hang the sachet in a spot away from direct water flow to maximize the tablet's longevity and effectiveness.
To activate the tablet, let the water and humidity moisten it, which releases the essential oils into the air, enhancing your shower routine.
After each use, allow the tablet to dry completely before re-wetting it for activation during subsequent showers. Each tablet can typically last for around 6-8 uses, depending on how often it gets wet.
Enjoy the invigorating experience! Additionally, using essential oils for relaxation can enhance your overall shower experience and promote a calming atmosphere.
Benefits of Essential Oils
Essential oils offer a powerful way to enhance your shower experience, delivering both emotional and physical benefits. Incorporating aromatherapy into your routine can help you revitalize and relax, providing a boost to your overall well-being. For instance, Grapefruit essential oil is energizing, invigorating your senses and lifting your spirits. Lavender, on the other hand, is perfect for those moments when you need to unwind, as it calms stress and anxiety, creating a tranquil atmosphere. Additionally, studies show that using essential oils like beet juice can also support overall cellular health, enhancing your body's natural balance. Moreover, some essential oils may contain antioxidants that help combat oxidative stress. Turmeric's anti-inflammatory properties can also be beneficial when combined with essential oils for soothing muscle tension. Sweet Orange essential oil adds a cheerful note to your shower, uplifting your mood with its invigorating aroma. By using these essential oils, you embrace a holistic approach to self-care, promoting mindfulness and rejuvenation in your daily rituals. Additionally, using essential oils in your shower can also promote mood enhancement and create a calming environment for relaxation.
Customer Experience
Incorporating aromatherapy into your routine can truly transform your shower experience, and customers are raving about it. They've discovered that Shower Burst® products, infused with mood-boosting essential oils, elevate their showers into rejuvenating spa experiences. Users report enhanced relaxation and mindfulness, making these bursts perfect for self-care routines after a long day. Additionally, using aromatherapy can align with your subconscious power to enhance overall well-being, as many essential oils can improve indoor air quality and create a refreshing environment. Regular use of these products can also lead to improved skin texture and hydration, contributing to a more radiant appearance. Black tea is known for its robust flavor and can also be a part of a calming routine when enjoyed after a refreshing shower.
Here's a glimpse of what you can expect:
Feature | Benefit | Customer Feedback |
---|---|---|
Pure Essential Oils | Promotes relaxation | "I feel so much calmer!" |
Longevity | Multiple uses per tablet | "Great value for money!" |
Convenient Packaging | Easy to use | "Love the reusable sachets!" |
With thoughtful packaging and effective formulas, it's no surprise that the customer experience is overwhelmingly positive!
Ordering Information
When you're ready to elevate your shower experience with Shower Burst products, placing your order is a breeze.
The Shower Burst® Variety Pack, priced at $19.95, offers four distinct scents made with 100% pure essential oils, ensuring a unique aromatherapy experience.
To guarantee delivery in time for Christmas, make sure to place your order by 12/6/24. Currently, orders can only be shipped within the United States and U.S. territories, as international shipping isn't available.
If you need to return an item, returns are accepted within 14 days of purchase, but remember to keep the original packaging.
For any inquiries or assistance, customer support is ready to help via phone at 800-927-2375 or email.
Enjoy your all-natural ingredients journey!
Frequently Asked Questions
How Do You Use Aromatherapy Shower Burst?
To use an aromatherapy shower burst, unwrap the tablet and place it in the provided sachet.
Hang the sachet in your shower, avoiding direct water contact. As you shower, the humidity will activate the tablet, releasing soothing essential oils into the air.
After your shower, let the tablet dry completely for reactivation in future showers.
Enjoy the invigorating scents and calming effects that enhance your overall shower experience.
How Do You Use Aromatherapy in the Shower?
When it comes to using aromatherapy in the shower, you're really in for a treat!
To get started, simply choose essential oils that resonate with you—like energizing citrus or calming lavender. Add a few drops to your shower floor or use a diffuser.
As the steam rises, the scents will envelop you, creating a spa-like atmosphere.
Make sure to take a moment to breathe deeply and let the aromas work their magic.
Enjoy!
What Does a Shower Burst Do?
A shower burst transforms your shower into a spa-like experience. When you activate it with water, it releases a blend of essential oils that invigorate or calm your senses.
You'll feel the stress melt away as the aromas fill the air, enhancing your mood and promoting relaxation. Each burst is designed for multiple uses, so after your shower, you can let it dry out and use it again for another uplifting session.
How to Use Aromatherapy in a Steam Shower?
Imagine stepping into a steam shower after a long day, ready for relaxation.
To use aromatherapy effectively, unwrap your Shower Burst and place it in the sachet. Hang it in the steam shower, away from direct water, so the humidity activates the essential oils.
This setup allows the steam to carry the soothing scents around you, enhancing your experience. By drying the sachet between uses, you can enjoy multiple showers of calming aromas.
Conclusion
Incorporating shower aromatherapy bursts into your routine can transform your daily wash into a rejuvenating escape. Remember, "a little goes a long way" when it comes to enhancing your shower experience. By using these bursts, you not only refresh your mind but also relax your body, allowing you to face the day with renewed energy. So, why not treat yourself? Immerse yourself in the world of scents and let each shower uplift your spirit!
As the Editor in Chief, Hyperosmia plays a pivotal role in shaping the content and direction of Aroma Oil Diffusers. With a discerning eye for detail and a passion for research, Hyperosmia ensures that our articles, guides, and resources are informative, accurate, and engaging. Through meticulously curated content, Hyperosmia strives to educate our readers on the latest trends, techniques, and benefits of aromatherapy.
Aroma Diffuser
The Ultimate Guide to Cleaning Your Aroma Diffuser: Keep It Fresh and Effective!
Navigate the essential steps to clean your aroma diffuser effectively; discover the secret to maintaining delightful scents in your home!
Cleaning your aroma diffuser regularly keeps it fresh and effective. Aim to clean it every 1-2 weeks, especially if you use it daily. Start by unplugging the device and emptying any remaining water and oils. Mix equal parts vinegar and water to wipe down the interior and use rubbing alcohol on the ultrasonic chip with a cotton swab. Rinse thoroughly with distilled water and clean the exterior with a damp cloth. Allow all components to dry completely before reassembling. With proper care, you'll enjoy delightful scents without unpleasant odors—stick around to discover more tips for keeping your diffuser in top shape!
Key Takeaways
- Clean your aroma diffuser every 1-2 weeks to prevent oil buildup and maintain optimal performance.
- Use a vinegar and water mixture for interior cleaning, and rinse with distilled water to avoid mineral deposits.
- Regularly check and clean the ultrasonic chip with rubbing alcohol to ensure efficient scent production.
- Inspect and clean the exterior with a damp cloth to prevent unpleasant odors and keep the device looking fresh.
- Troubleshoot issues like weak aroma or leaks by ensuring thorough cleaning and checking for blockages or damaged seals.
Importance of Regular Cleaning
Regular cleaning is essential for your aroma diffuser to function at its finest. When you use your essential oil diffuser, oils and residue can accumulate, potentially clogging the ultrasonic disk. This buildup diminishes its performance and efficiency over time, affecting your overall aromatherapy experience.
By practicing proper cleaning, you not only maintain ideal scent diffusion but also prevent unpleasant odors that can arise from neglected maintenance. Regular cleaning enhances your diffuser's longevity, ensuring it operates quietly and effectively.
Plus, adhering to a consistent cleaning routine helps you avoid costly repairs or replacements due to permanent damage caused by residue. Additionally, maintaining a clean diffuser can improve air quality, similar to how air purifiers reduce pollutants and enhance the overall environment. So, take the time to clean your diffuser regularly and enjoy the full benefits of your favorite oils!
Recommended Cleaning Frequency
To keep your aroma diffuser performing well, it's important to establish a cleaning routine that matches how often you use it. For regular usage, aim to clean your diffuser every 1-2 weeks. This frequency helps maintain peak performance and fragrance quality.
If you're using it less often, try to clean it at least four times a year to prevent buildup in the water reservoir. Adjust your cleaning schedule based on how intensively you use the diffuser; heavier usage might require more frequent cleanings.
Monthly deep cleaning is also advisable to tackle stubborn residues. Always consult your specific unit's manual for tailored cleaning instructions to guarantee you're following the best practices for your diffuser model.
Step-by-Step Cleaning Process
Cleaning your aroma diffuser doesn't have to be a hassle. Start by unplugging it and emptying any remaining water and essential oils from the water reservoir.
Use a soft cloth or paper towel with a mixture of one teaspoon of vinegar and two to three teaspoons of water to wipe the interior, breaking down any accumulated oils and residues.
For ultrasonic diffusers, gently clean the ultrasonic chip with a cotton swab dipped in rubbing alcohol to remove buildup.
Rinse the reservoir thoroughly with distilled water to eliminate cleaning solution residues before refilling with essential oils.
Finally, allow all components to dry completely before reassembling the diffuser to guarantee peak performance and prevent damage.
Cleaning Supplies Needed
To clean your aroma diffuser effectively, you'll need a few essential supplies.
Soft cloths or paper towels will protect its surfaces, while Q-tips help you reach those tricky spots.
Don't forget to stock up on safe cleaning solutions like distilled water and white vinegar for a thorough clean.
Essential Cleaning Tools
A well-stocked cleaning kit is key to maintaining your aroma diffuser's performance and longevity. Essential cleaning tools include soft cloths or paper towels, which prevent scratches while you clean.
You should also have Q-tips on hand; they're perfect for reaching those hard-to-access areas within your diffuser. For rinsing the reservoir, distilled water is recommended to avoid impurities that could affect performance.
White vinegar serves as a natural cleaning agent, breaking down oil buildup and keeping your diffuser fresh. Finally, rubbing alcohol is effective for disinfecting and tackling tough stains, especially in electric diffusers.
With these tools in your cleaning arsenal, you'll guarantee your diffuser stays clean, functional, and ready to fill your space with delightful aromas.
Safe Cleaning Solutions
Maintaining your aroma diffuser goes beyond just having the right tools; it also involves knowing which cleaning solutions are safe and effective. Here's a handy table for your reference:
Cleaning Solution | Purpose | Application |
---|---|---|
Soft Cloths | Prevent scratches | Wipe down the exterior |
White Vinegar | Natural cleaning agent | Breaks down oil residue |
Distilled Water | Rinsing | Clean the reservoir |
Cotton Swabs | Hard-to-reach areas | Clean around ultrasonic chip |
Rubbing Alcohol | Disinfect and remove stains | Use cautiously in electric diffusers |
Troubleshooting Common Issues
Sometimes, you might encounter issues with your aroma diffuser that can impact its performance. If you notice insufficient scent production, it could mean you need to refill your essential oils or replace the reeds in reed diffusers.
On the other hand, if the scent is too strong, simply reduce the amount of oil used. Make sure your diffuser is plugged in properly to avoid any operational issues.
If it's bubbling but not producing vapor, check the water level against the fill line and inspect the disc for damage.
Regular cleaning and maintenance can help prevent these common issues, ensuring your diffuser runs smoothly and effectively according to the manufacturer instructions.
Tips for Optimal Maintenance
To keep your aroma diffuser in prime condition, establish a regular cleaning schedule every 1-2 weeks.
Make certain you have the right supplies, like white vinegar and water, to tackle any buildup effectively.
Regular Cleaning Schedule
Cleaning your aroma diffuser every 1-2 weeks is essential for best performance. Establishing a regular cleaning schedule helps maintain the quality of your essential oils and prevents oil residues from impacting functionality. Additionally, keeping your diffuser clean can help reduce the risk of ear pressure that may arise from poor air quality in your environment. Adjust the frequency based on usage intensity; if you use your diffuser frequently, weekly cleanings may be necessary. Seasonal changes can also dictate your cleaning intervals, especially during winter months when diffusing is popular. Always consult your instruction manual for specific recommendations tailored to your unit. Maintaining cleanliness is crucial, as cleaning filters regularly can enhance the efficiency of devices that operate similarly.
Usage Frequency | Recommended Cleaning Schedule | Notes |
---|---|---|
Daily Use | Every week | Prevents buildup of residues |
Moderate Use | Every 1-2 weeks | Maintains scent quality |
Infrequent Use | At least 4 times a year | Guarantees longevity and performance |
Proper Cleaning Supplies
Using the right cleaning supplies is essential for maintaining your aroma diffuser's efficiency and longevity.
Start with soft cloths or paper towels to gently clean the surfaces without scratching. For those hard-to-reach areas, Q-tips or cotton swabs work wonders. Regular cleaning helps in reducing skin infections and irritations, ensuring a healthier environment for your aromatic experience.
When rinsing the reservoir, opt for distilled water, as it's free from impurities that could disrupt performance.
White vinegar is your go-to natural cleaner; it effectively breaks down oil buildup without harmful chemicals.
For tougher stains, rubbing alcohol is excellent for disinfecting and ensuring thorough sanitation, especially in electric diffusers. Additionally, incorporating nutrient-rich breakfasts can enhance your overall well-being, making it easier to maintain a cleaning routine.
Frequently Asked Questions
What Is the Best Way to Clean an Aroma Diffuser?
To clean your aroma diffuser effectively, start by unplugging it and emptying any leftover water and oils.
Wipe the interior with a soft cloth soaked in a vinegar-water solution.
For deeper cleaning, run a mix of one teaspoon of white vinegar with two to three teaspoons of water in the diffuser for about 30 minutes.
Don't forget to clean the ultrasonic disk with rubbing alcohol using a cotton swab for ideal performance.
How Can I Make My Aroma Diffuser Last Longer?
If you want to make your aroma diffuser last longer, you've got to treat it like gold.
Start by cleaning it every 1-2 weeks to prevent residue buildup. Use a vinegar-water mix for deep cleaning at least once a month.
Always unplug it before cleaning to avoid damage. Stick to low-viscosity essential oils to keep the ultrasonic disk clear.
Following these tips will keep your diffuser running smoothly for years to come!
How Does Vinegar Clean a Diffuser?
Vinegar cleans your diffuser by breaking down oil residue and mineral buildup thanks to its acidic properties.
When you mix one teaspoon of white vinegar with two to three teaspoons of water and run it in your diffuser for about 30 minutes, it effectively cleans the internal components.
This not only removes unpleasant odors but also leaves your diffuser fresh for the next use.
Just remember to rinse it afterward to eliminate any vinegar scent!
How to Get Mildew Smell Out of a Diffuser?
To get mildew smell out of your diffuser, start by unplugging it and emptying any remaining water.
Mix one teaspoon of white vinegar with two teaspoons of water, and run this solution in the diffuser for about 30 minutes.
After that, rinse the reservoir with distilled water to remove any vinegar.
Finally, use a cotton swab dipped in rubbing alcohol to clean the ultrasonic disk, ensuring it's free of stubborn mildew.
Regular maintenance helps prevent future smells.
Conclusion
In a world where even your grandma knew the importance of a fresh scent, keeping your aroma diffuser clean is vital for its performance and longevity. By sticking to a regular cleaning routine, you'll guarantee your space remains inviting and your diffuser works like a charm. Remember, a little maintenance goes a long way! So, grab those cleaning supplies and give your diffuser the care it deserves—your senses will thank you!
As the Editor in Chief, Hyperosmia plays a pivotal role in shaping the content and direction of Aroma Oil Diffusers. With a discerning eye for detail and a passion for research, Hyperosmia ensures that our articles, guides, and resources are informative, accurate, and engaging. Through meticulously curated content, Hyperosmia strives to educate our readers on the latest trends, techniques, and benefits of aromatherapy.
Aroma Diffuser
How to Modify an Aromatherapy Diffuser: Customization Made Simple!
Customize your aromatherapy diffuser for a unique scent experience that transforms your space; discover the simple steps to elevate your relaxation today!
Modifying your aromatherapy diffuser lets you personalize your scent experience. Start by selecting the right essential oils based on the mood you want to create. Blend oils, like lavender and chamomile, for a calming effect using a good ratio—1 drop base, 3 drops middle, and 1 drop top note. Tweak these amounts to find your perfect strength. Don't forget to maintain your diffuser by cleaning it every few uses. You can also explore various technologies, like cold-air nebulizing, to enhance aroma diffusion. Keep experimenting and you'll discover endless possibilities for a customized experience!
Key Takeaways
- Adjust Scent Intensity: Utilize customizable features on your diffuser to control the strength of the aroma based on your preference.
- Experiment with Oil Blends: Combine various essential oils to create unique blends that suit your mood or seasonal themes.
- Vary Diffusing Time: Use scheduling options to alternate between different oils or adjust duration for a changing scent experience.
- Optimize Diffuser Placement: Position your diffuser in different areas to see how scent dispersal varies throughout your space.
- Regular Maintenance: Clean your diffuser every 3-5 uses to ensure optimal performance and prevent oil buildup.
Understanding Diffuser Technology
When exploring aromatherapy, understanding diffuser technology is crucial because it influences your overall experience.
Different types of diffusers, like ultrasonic diffusers and cold-air nebulizing models, offer unique benefits for distributing essential oils. Ultrasonic diffusers create a fine mist by using water and ultrasonic vibrations, while cold-air nebulizing diffusers break down essential oils into a concentrated mist without water or heat.
This technology preserves the integrity of essential oils, providing a potent scent experience and maximizing therapeutic benefits. Many modern diffusers also come with customizable features, such as adjustable scent intensity and scheduling options, which enhance your aromatherapy experience. Additionally, using essential oils with natural antibacterial properties can further improve the atmosphere in your space.
Knowing the type of diffuser you're using can considerably affect scent strength and dispersal area, making this understanding crucial.
Choosing the Right Essential Oils
When you're choosing essential oils for your diffuser, think about the aromatic profiles that suit your mood or the season. Understanding blending techniques can help you create a harmonious mix, while seasonal oil recommendations can enhance your ambiance year-round. For instance, combining lavender and chamomile can promote relaxation benefits that elevate your overall experience. Additionally, considering the anti-inflammatory properties of certain oils can further enhance the therapeutic effects of your blends. The use of citrus scents like orange and lemon can also uplift your mood, making them perfect for a refreshing atmosphere. Moreover, some essential oils, such as lavender oil, are known to have calming effects that can help reduce anxiety and improve sleep quality.
Selecting Aromatic Profiles
Choosing the right essential oils can greatly enhance your aromatherapy experience, as each oil offers unique benefits and scents.
When selecting aromatic profiles, think about the effects you want to achieve. Consider these scent profiles:
- Calming: Lavender—perfect for relaxation.
- Energizing: Peppermint—invigorates your space.
- Uplifting: Citrus oils—like Lemon, brighten your mood. Incorporating herbal alternatives can also provide additional calming effects, as certain herbal teas, like chamomile tea, may promote relaxation and improve sleep quality. Additionally, oils like eucalyptus oil can enhance respiratory function, making them a great choice for invigorating blends.
Experimenting with essential oil combinations can lead to delightful blends.
For instance, mix Lavender with Bergamot for a soothing atmosphere or Lemon with Rosemary for an energizing touch.
To create balanced aromas, remember the recommended blending ratio: 1 drop of base note oils, 3 drops of middle notes, and 1 drop of top notes. Proper steeping time for your chosen tea can also influence the overall ambiance and effectiveness of your aromatherapy experience.
Document your blends to refine your skills in customizing aromatic profiles!
Blending Techniques Explained
To achieve the perfect blend of essential oils for your aromatherapy diffuser, understanding blending techniques is crucial.
Start by categorizing your oils by their effects, like calming or energizing, and their scent profiles, such as floral or citrus. A great blending ratio is 1 drop of base note, 3 drops of middle note, and 1 drop of top note for balanced essential oil blends.
Don't hesitate to experiment—try pairing energizing oils like Peppermint with calming oils like Lavender for unique diffuser blends. Document your successful combinations and label them to track ingredients and effects over time.
Finally, conduct scent tests with open bottles or cotton swabs to verify your chosen oils work harmoniously before finalizing your blend.
Seasonal Oil Recommendations
As the seasons change, so does the opportunity to enhance your space with the right essential oils. Customizing your aromatherapy diffuser with seasonal oil recommendations can elevate the ambiance and evoke nostalgic feelings.
Here are three essential oils to contemplate:
- Spring: Roman Chamomile and Geranium for renewal and freshness.
- Summer: Lemon and Grapefruit to uplift and energize your warm days.
- Autumn: Cedarwood and Cinnamon to bring cozy, spicy warmth.
For winter, choose grounding oils like Frankincense and warm scents such as Clove. Aromatherapy can enhance mood and each of these fragrance oils not only transforms your environment but also helps set the mood appropriate to the season. Embrace the power of essential oils to create a welcoming atmosphere year-round!
Creating Custom Oil Blends
Creating custom oil blends for your aromatherapy diffuser can be a rewarding and enjoyable experience.
Start by categorizing essential oils based on their effects, like calming or energizing, and their scent profiles, such as floral or citrus. Utilizing oils that align with your desired state can enhance your vibrational energy, further promoting relaxation and well-being.
For a balanced blend, follow the recommended ratio: 1 drop of base note, 3 drops of middle note, and 1 drop of top note.
Experiment with different combinations—pair citrus oils with grounding oils for a unique aromatic profile.
Document your successful blends and label them to track ingredients and their effects.
Before committing to larger quantities, conduct scent tests using cotton swabs or open bottles to refine your blend, ensuring the final product meets your expectations.
Additionally, it's important to dilute oils significantly before using them in your diffuser to ensure safety and prevent overwhelming scents.
Happy blending!
Techniques for Optimal Scent Balance
To find the perfect scent balance, start with a basic ratio of 1 drop of base note, 3 drops of middle note, and 1 drop of top note.
You can tweak these amounts based on how strong you want the scent to be.
Remember to reflect on how the oils interact and adjust accordingly for a blend that truly resonates with you.
Ratio of Essential Oils
Finding the perfect balance in your essential oil blend can transform your aromatherapy experience. To achieve an ideal scent, pay attention to the ratio of essential oils. A common starting point is:
- 1 drop of base note – it lingers, providing a lasting foundation.
- 3 drops of middle note – these balance the blend, adding warmth and depth.
- 1 drop of top note – they evaporate quickly, adding freshness and brightness.
Using 3-5 different oils per blend guarantees a well-rounded aroma. Incorporating predictive modeling may help you understand which blends resonate best with your personal preferences over time. Additionally, consider using oils like rooibos or its unique varieties to add a soothing and earthy undertone to your blend. The use of adaptogenic herbs can further enhance your overall wellness, creating a more enriching atmosphere.
Remember, strong-scented oils should be added sparingly, typically limiting them to one or two drops. Regularly incorporating calming oils can also help reduce cortisol levels, contributing to a more tranquil atmosphere.
Scent Strength Adjustments
Achieving the right scent strength in your aromatherapy diffuser can elevate your experience considerably. Start by experimenting with the number of drops of essential oils, adjusting ratios based on your scent preferences. Use fewer drops for stronger oils to prevent overwhelming aromas.
Conduct smell tests by sniffing oil bottle caps for a better sense of strength before finalizing your blend. If the scent's too strong, consider using a carrier oil for dilution or try intermittent diffusing. Regularly assess your diffuser settings, like intensity and timing, to maintain a balanced aroma throughout your space. Additionally, certain essential oils like lavender oil are widely recognized for their calming effects, making them ideal for relaxation when diffused.
Here's a quick reference table to help you:
Essential Oil | Recommended Drops | Strength Level |
---|---|---|
Lavender | 3 | Mild |
Peppermint | 2 | Strong |
Lemon | 4 | Moderate |
Eucalyptus | 1 | Very Strong |
Tea Tree | 2 | Moderate |
Maintaining Your Diffuser
While enjoying the soothing scents of your aromatherapy diffuser, it's crucial to keep it well-maintained to guarantee peak performance.
Regular cleaning not only enhances the quality of aromas but also extends your diffuser's longevity. Air purifiers can also improve indoor air quality by eliminating odors, which complements the use of an aromatherapy diffuser.
Follow these simple maintenance tips:
- Clean every 3-5 uses: Use a mixture of water and vinegar or rubbing alcohol to prevent residue build-up.
- Disassemble carefully: Follow the manufacturer's instructions to guarantee thorough cleaning without damaging any parts.
- Check essential oils: Replace any that have become rancid or lost their fragrance strength. Additionally, ensure that your diffuser is free of unusual noises that may indicate mechanical issues.
Enhancing Aroma Diffusion
Enhancing the aroma diffusion experience can transform your space into a soothing sanctuary.
To achieve this, consider using cold-air nebulizing technology, which preserves the integrity of essential oils without heat or water. Customizable features like scent intensity control and scheduling options let you tailor your aroma diffusion to fit your preferences.
If you're using reed diffusers, regularly flip the reeds to refresh the scent, and replace saturated reeds to maintain aroma strength.
For a balanced aroma profile, blend essential oils with a mix of top, middle, and base notes.
Finally, choose a glass or ceramic container with a narrow opening for your reed diffusers, slowing evaporation and optimizing scent distribution throughout your environment.
User Experiences and Tips
What if you could elevate your aromatherapy experience by learning from others? Users have shared valuable tips that can really enhance your diffuser setup.
Here are three to take into account:
- Start with 3-5 essential oils in your blends to find your favorite oils without overwhelming scents.
- Flip the reeds in your homemade reed diffusers weekly to maintain a stronger scent and prolong the aroma's effectiveness.
- Document your successful blends to easily recreate those cherished scents, making your space feel uniquely yours.
Experimenting with different combinations can combat specific odors, so don't hesitate to try new blends.
Engaging with the community can also provide fresh insights and inspire your aromatherapy journey!
Additional Resources and Community Support
Connecting with additional resources and community support can considerably enhance your aromatherapy journey.
You'll find easy DIY recipes that let you experiment with essential oil combinations tailored to your preferences. Seasonal ideas can spark creativity, making blend creation a fun project for families during holidays. Additionally, exploring the benefits of dietary fiber can inspire you to incorporate healthy habits into your lifestyle.
Stay updated with blog posts featuring new diffuser blend ideas, and don't hesitate to reach out for customer support if you have questions about customization options for your diffuser.
Engaging on social media also fosters a sense of community among essential oil enthusiasts, where you can share experiences, tips, and favorite blends. Additionally, exploring eco-friendly materials for your diffuser can contribute to a more sustainable aromatherapy practice.
With these resources at your fingertips, you'll feel empowered to explore the art of aromatherapy fully.
Frequently Asked Questions
Can You Add Anything to a Diffuser?
You can definitely add various things to a diffuser, but it's important to choose wisely.
Pure essential oils are your best bet; they maintain therapeutic benefits. You might also consider adding a carrier oil to help with diffusion, but steer clear of heavy oils that can clog the device.
Blending different oils can create a customized scent, so experiment with your favorites to find the perfect balance that suits your mood and environment!
How to Make Your Own Diffuser Blend?
To make your own diffuser blend, start by categorizing essential oils based on their effects, like calming or energizing.
Use a ratio of 1 drop of base note, 3 drops of middle note, and 1 drop of top note for balance.
Experiment with combinations and document successful blends for future use.
Conduct scent tests with open bottles to see how they interact before finalizing your blend for a truly personalized experience.
How Do You Improvise a Diffuser?
If you need to improvise a diffuser, try using a small bowl of water mixed with your favorite essential oils. As the water evaporates, the scent will fill the air.
Alternatively, soak cotton balls in essential oils and place them in a jar for gradual aroma release.
You can also use a ceramic container with carrier oil and bamboo skewers, or simply add oils to simmering water on the stove for a quick scent boost.
Can You Put Vanilla Extract in a Diffuser?
You shouldn't put vanilla extract in your diffuser.
While it might smell great, vanilla extract often contains alcohol and other additives that can damage your diffuser, especially ultrasonic models.
Instead, opt for pure vanilla essential oil or a specifically formulated vanilla fragrance oil designed for diffusers.
If you're feeling crafty, you can also try making a homemade reed diffuser using vanilla essential oil and a carrier oil for a natural scent alternative.
Conclusion
To sum up, customizing your aromatherapy diffuser can transform your space into a serene sanctuary. With the right oils and blends, you'll create mesmerizing combinations that uplift your spirit and soothe your soul. Remember, maintaining your diffuser is key to maximizing its magic. Embrace the enchanting experience of aroma diffusion, and don't hesitate to share your fragrant findings with fellow enthusiasts. Together, you can cultivate a community of comfort and creativity, spreading joy through the power of scent!
As the Editor in Chief, Hyperosmia plays a pivotal role in shaping the content and direction of Aroma Oil Diffusers. With a discerning eye for detail and a passion for research, Hyperosmia ensures that our articles, guides, and resources are informative, accurate, and engaging. Through meticulously curated content, Hyperosmia strives to educate our readers on the latest trends, techniques, and benefits of aromatherapy.
-
Essential Oils3 days ago
How to Use Mainstays Aromatherapy Essential Oils: Transform Your Home With Ease!
-
Essential Oils3 days ago
Cleansing Essential Oils: Purify Your Mind, Body, and Space!
-
Essential Oils3 days ago
Essential Oils to Get Rid of Skunk Smell in Your House: A Miracle Solution!
-
Essential Oils3 days ago
How to Dispose of Essential Oils Safely: Protect Your Health and Environment!
-
Beginners Guides1 day ago
How Long Are Aromatherapy Sessions? What You Need to Know!
-
Beginners Guides1 day ago
How to Make an Aromatherapy Rice Bag: Cozy Comfort Made Simple!
-
Essential Oils3 days ago
How to Use Glycerin in Aromatherapy: Enhance Your Scents Naturally!
-
Vetted3 days ago
7 Best Budget-Friendly Aroma Products for Beginners: Affordable Ways to Enhance Your Space