Connect with us

Beginners Guides

How to Make Aromatherapy Products at Home: DIY Secrets Unveiled!

Find out how to craft soothing aromatherapy products at home and unlock the secrets to enhancing your wellness experience with simple ingredients!

Published

on

diy aromatherapy product guide

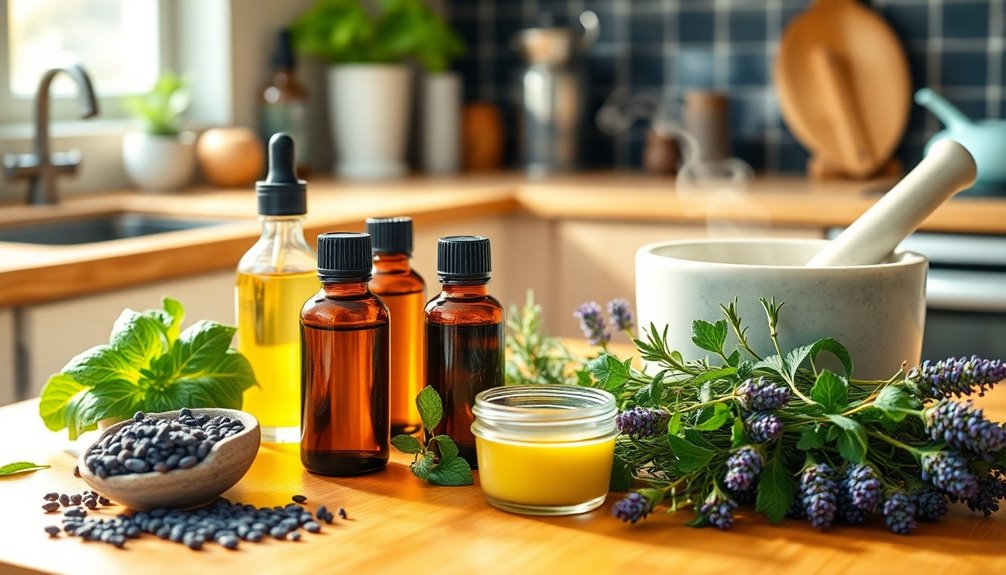
You can easily create your own aromatherapy products at home with just a few materials. Start with essential oils like lavender or eucalyptus for their soothing benefits. For a simple room spray, mix 10-15 drops of your favorite oil with distilled water in a glass bottle and shake well before use. Try adding carrier oils for skin applications or experiment with blends in diffuser recipes. Remember to aim for organic and sustainable sources to enhance your DIY projects. There's so much more to explore that can elevate your aromatherapy experience even further!

Key Takeaways

  • Gather essential materials like essential oils, carrier oils, and mixing containers to start your DIY aromatherapy projects.
  • Create room sprays by mixing distilled water with 10-15 drops of your favorite essential oils in a glass bottle.
  • Experiment with unique scent combinations, blending different essential oils to find your perfect fragrance profile.
  • Use a common blending ratio of 20-30% essential oils to 70-80% carrier oils for safe and effective applications.
  • Store your blends in dark glass bottles to protect them from light and heat, ensuring longevity and effectiveness.
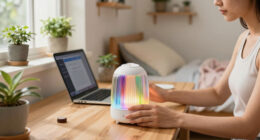
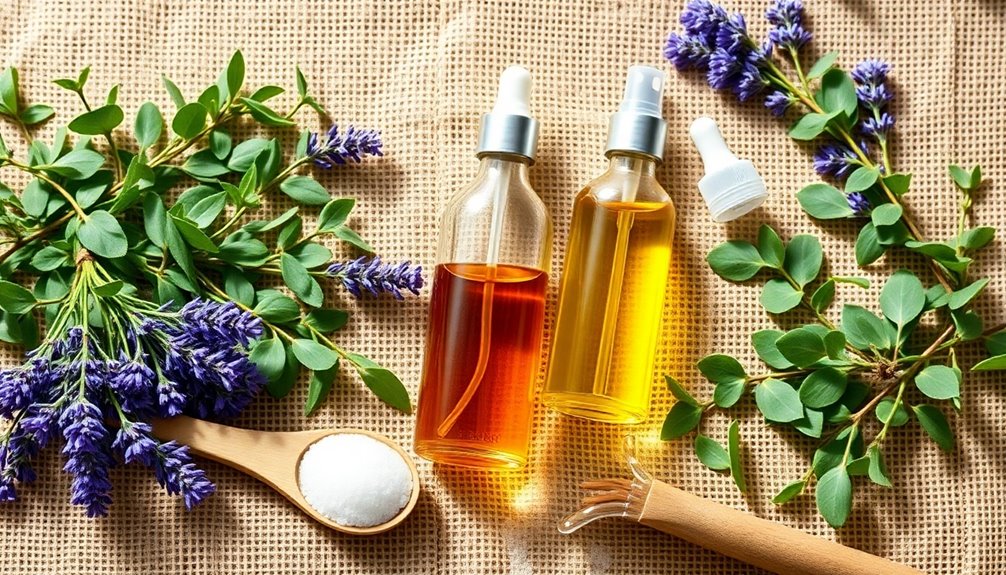
Benefits of Essential Oils

aromatherapy promotes health benefits

Essential oils offer a multitude of benefits that can enhance your well-being. These essential oils possess antimicrobial properties, effectively fighting airborne germs and boosting your immunity against infections.

Regular use can improve your skin and hair health, promoting relaxation through their natural compounds. Oils like lavender and bergamot are known for their calming effects, helping you alleviate stress and elevate your mood.

Not only that, but essential oils also serve as natural insect repellents, providing an eco-friendly alternative to chemical products.

When you combine essential oils with carrier oils, you enhance absorption and effectiveness, making DIY aromatherapy recipes a practical option for self-care. Additionally, using oils like lavender oil can significantly reduce stress levels and promote better sleep quality.

Embrace these health benefits to enrich your daily routine and overall wellness!

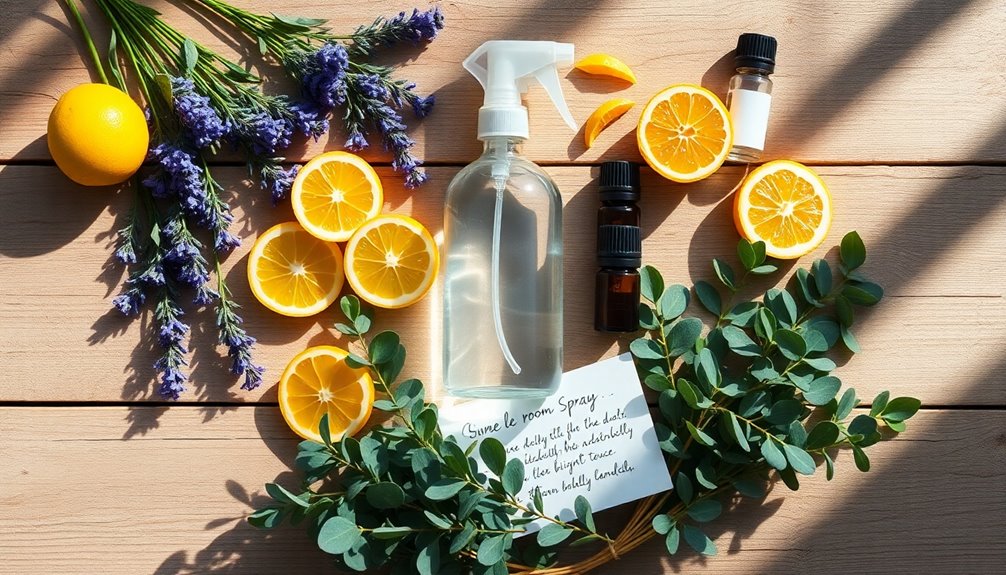
Essential Oils for Room Spray

aromatic room spray essentials

Aromatherapy can extend beyond personal care to create a revitalizing atmosphere in your home. Using essential oils like lemon, eucalyptus, and frankincense in your DIY room spray not only uplifts your space but also cleanses the air of pathogens.

Here's how to get started:

  • Combine distilled water with 10-15 drops of your chosen essential oils in a 4-ounce glass bottle.
  • Shake well before each use for even distribution.
  • Enhance effectiveness with a carrier oil for better absorption.
  • Store in a cool, dark place and refresh every few weeks.
  • Experiment with combinations, like rosemary and clove, for unique scents. Additionally, using eucalyptus oil can help clear nasal passages and promote easier breathing in your space.

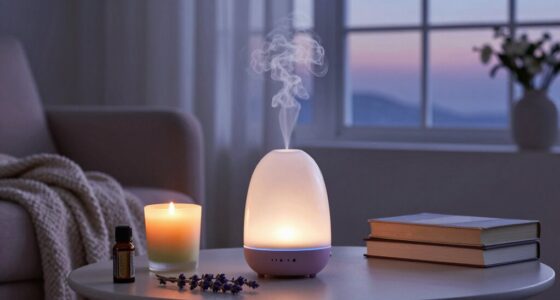
For an even broader aroma experience, consider using an essential oil diffuser alongside your DIY essential oil creations!

DIY Room Spray Recipe

homemade fragrant room spray

Creating your own room spray starts with choosing the right essential oils that match your mood and space.

Once you've picked your favorites, mixing them with distilled water is a breeze, but don't forget to store your blend properly to keep it fresh. It's also essential to consider the recommended quantity for candles when determining how much essential oil to use in your spray.

Let's explore some tips on selecting essential oils and the best techniques for mixing and storing your DIY spray.

Essential Oil Selection Tips

When you're crafting your DIY room spray, selecting the right essential oils can make all the difference in both scent and health benefits.

Consider these tips for an effective blend:

  • Use lemon essential oil for its uplifting aroma and pathogen-cleansing properties.
  • Add eucalyptus essential oil to relieve stuffiness and prevent infection.
  • Incorporate frankincense essential oil to bolster immunity.
  • Include rosemary essential oil to enhance circulation and support breathing health.
  • Opt for clove essential oil to cleanse germs and create a cozy atmosphere.

Mixing a combination of essential oils can help you achieve a balanced scent profile while maximizing health benefits.

Always test your mixture in small amounts to guarantee you enjoy the scent and effects before making a larger batch. Additionally, remember that certain scents, like lavender and chamomile, are known to promote relaxation and calmness, enhancing the overall experience of your DIY room spray.

Mixing and Storage Techniques

To craft an effective DIY room spray, you'll need to focus on both the mixing techniques and proper storage methods.

Start by cleaning your blending area with rubbing alcohol to eliminate contaminants. In a glass bottle, combine distilled water with 10-20 drops of your chosen essential oils.

Feel free to experiment with combinations like lemon and eucalyptus for freshness or lavender and rosemary for relaxation.

Once your room spray is mixed, store it in a cool, dark place to maintain the potency of the essential oils. It's also important to remember that essential oils can degrade over time if not stored properly.

Don't forget to shake the bottle well before each use to enhance aroma distribution.

Finally, label your spray bottle to keep track of your unique blends for future enjoyment!

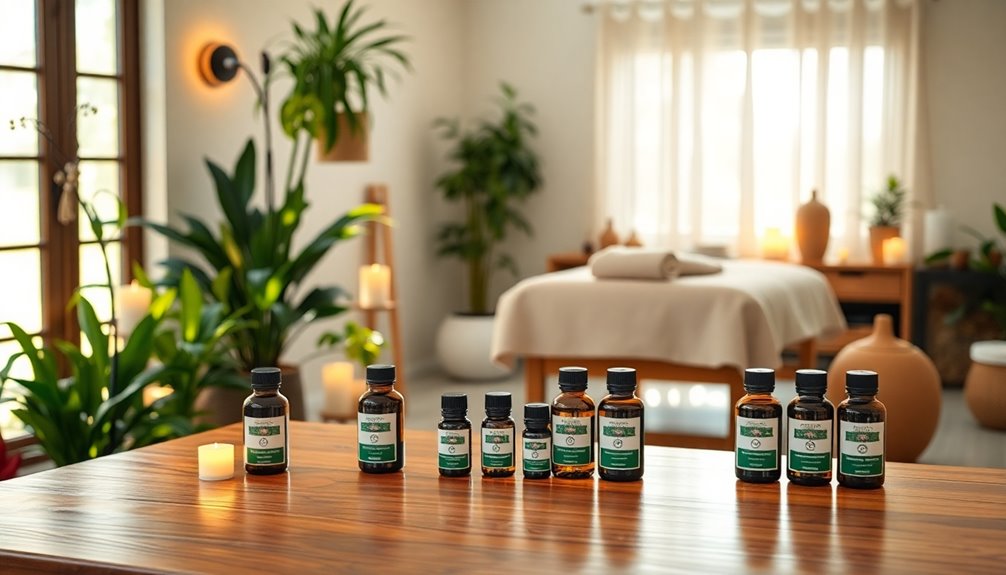
Essential Oil Bundles and Deals

affordable essential oil packages

Essential oil bundles offer an exciting opportunity to plunge into the world of aromatherapy without overspending.

These collections let you explore high-quality essential oils while keeping your budget intact. Here are some fantastic options to contemplate:

  • Top 12 Essential Oils Set with Diffuser – $72.99 for a variety of DIY projects.
  • Ultimate Mosquito Pack – $32.82 for natural pest control and health benefits.
  • Timeless Beauty Bundle – $37.99 for supporting skin health and radiance.
  • Organic Aromatherapy Set – $25.99 to experiment with premium oils affordably.
  • Age-Defying Essentials Duo – $27.90, perfect for natural wellness at a discount.

With these bundles, you can easily enhance your home and well-being without breaking the bank! Additionally, incorporating essential oils into your routine can promote digestive health and overall wellness through their therapeutic properties.

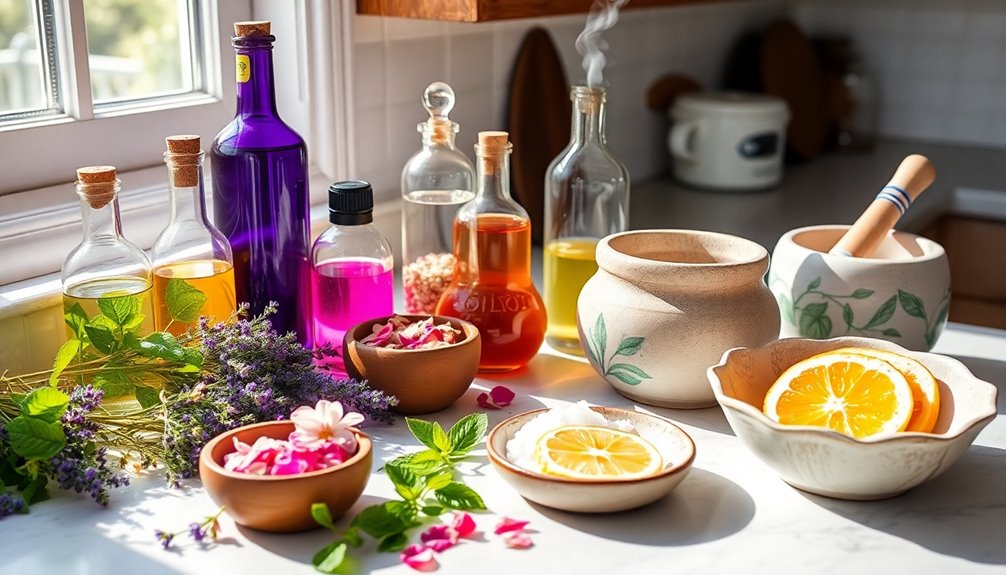
Sustainable Practices in Aromatherapy

eco friendly aromatherapy techniques

When you explore sustainable practices in aromatherapy, you'll want to focus on eco-friendly sourcing and organic ingredients. Reducing waste through DIY techniques not only benefits the environment but also allows you to create personalized blends. Additionally, incorporating essential oils in your recipes can enhance both the effectiveness and aroma of your products.

Eco-Friendly Sourcing Practices

As you explore the world of aromatherapy, you'll quickly realize that eco-friendly sourcing practices are essential for minimizing environmental impact.

Choosing organic and sustainably-sourced essential oils not only supports responsible farming but also aids in preserving biodiversity. By educating yourself on the origins of these oils, you can make ethical purchasing decisions that benefit both yourself and the planet.

Consider these eco-friendly sourcing practices:

  • Look for certified organic essential oils.
  • Support brands that prioritize sustainable farming.
  • Research the sourcing methods of your favorite products.
  • Choose companies that minimize plastic packaging.
  • Engage in DIY practices to reduce waste.

Additionally, incorporating herbal alternatives into your aromatherapy can enhance the benefits of your products while promoting natural anti-aging effects.

Waste Reduction Techniques

To further your commitment to sustainability in aromatherapy, implementing waste reduction techniques can make a significant difference.

Start by embracing DIY methods to create essential oil blends and natural cleaning products, which cuts down on single-use plastic containers. Use carrier oils and repurposed glass bottles for storage; this not only enhances the effectiveness of your essential oils but also minimizes waste.

Opt for bulk purchases of essential oils and ingredients to reduce packaging waste and support eco-friendly businesses.

Additionally, share your knowledge about essential oil usage within your community to promote a collective approach to sustainability. Incorporating eco-friendly materials into your DIY projects can further enhance your commitment to sustainable practices.

Organic Ingredient Importance

Choosing organic ingredients in your DIY aromatherapy products not only enhances their effectiveness but also supports sustainable practices that benefit the environment.

By opting for organic essential oils and carrier oils, you're ensuring a safer experience for both your skin and the planet.

  • Free from synthetic additives and harmful pesticides
  • Promotes eco-friendly farming methods and biodiversity
  • Guarantees higher purity levels, enhancing therapeutic effects
  • Supports fair trade practices and local economies
  • Contributes to environmental conservation efforts

When you prioritize organic ingredients, you empower responsible sourcing in the essential oil industry. This choice not only elevates your aromatherapy experience but also aligns your wellness practices with a commitment to sustainability. Additionally, the use of organic ingredients can help mitigate the impact of climate change on agricultural production, ensuring a more resilient supply chain for your aromatherapy products.

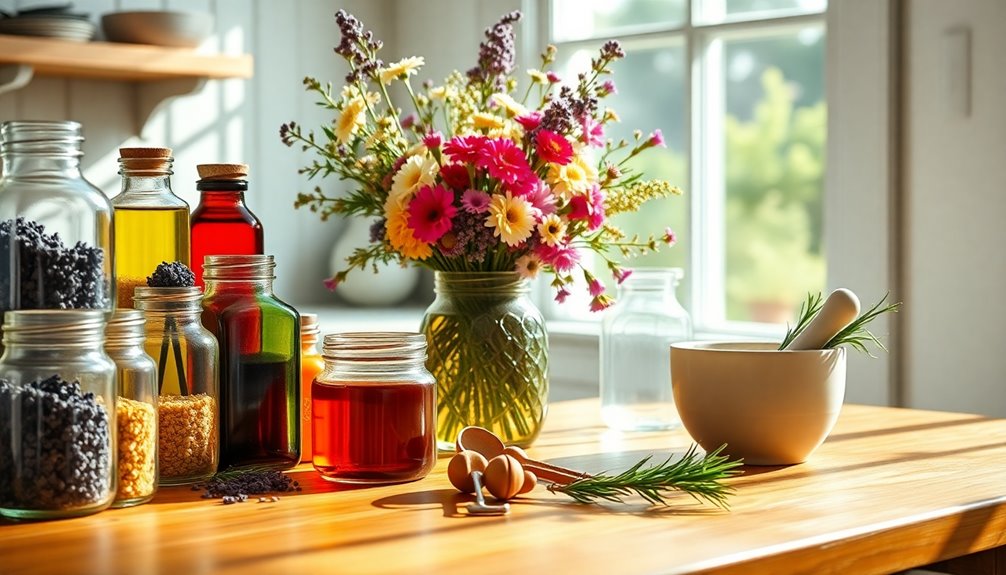
Materials Needed for DIY Projects

essential supplies for crafting

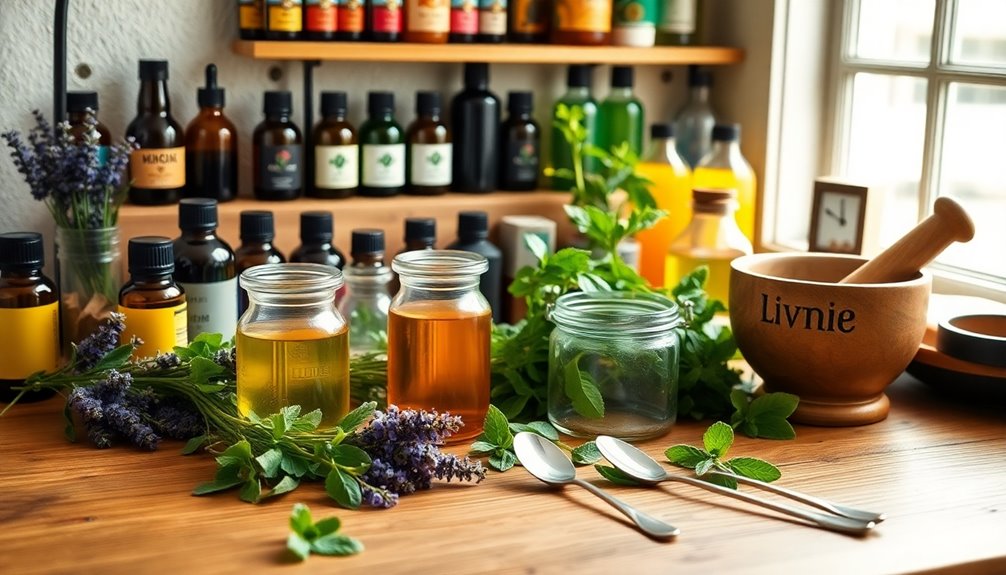
Creating your own aromatherapy products can be a rewarding experience, but having the right materials is key. Here's what you'll need:

Material Purpose Examples
Essential Oils For therapeutic benefits Lavender, Eucalyptus, Tea Tree
Carrier Oil To dilute essential oils for safe application Jojoba, Coconut
Mixing Container For blending and storing your mixtures Glass jar or bowl
Stirring Tool To mix oils evenly Wooden spoon or chopstick

With these materials in hand, you'll be on your way to creating beautiful and beneficial aromatherapy products. Don't forget to add decorative items like stones or herbs to enhance your creations!

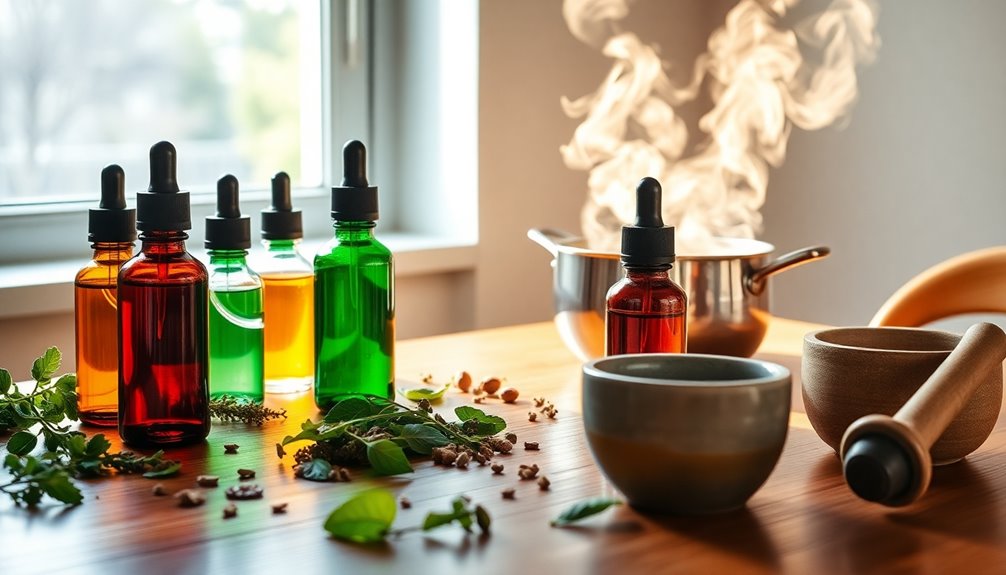
Creating Homemade Diffusers

diy scented oil diffusers

With the right materials gathered, you're ready to craft your own homemade diffuser. Start by filling a glass jar or bowl with water, ensuring it completely covers the essential oils you'll add for ideal scent dispersion.

Drop in 5-10 drops of your chosen essential oil, like lavender or eucalyptus, adjusting based on the jar's size and your desired aroma strength. Use a wooden spoon or chopstick to stir gently, mixing the oils evenly.

To enhance the look of your diffuser, consider adding decorative items like:

  • Stones
  • Dried herbs
  • Flowers
  • Colorful marbles
  • Shells

For the best results, place your diffuser in a well-ventilated area, steering clear of direct sunlight and heat sources.

Enjoy the soothing scents!

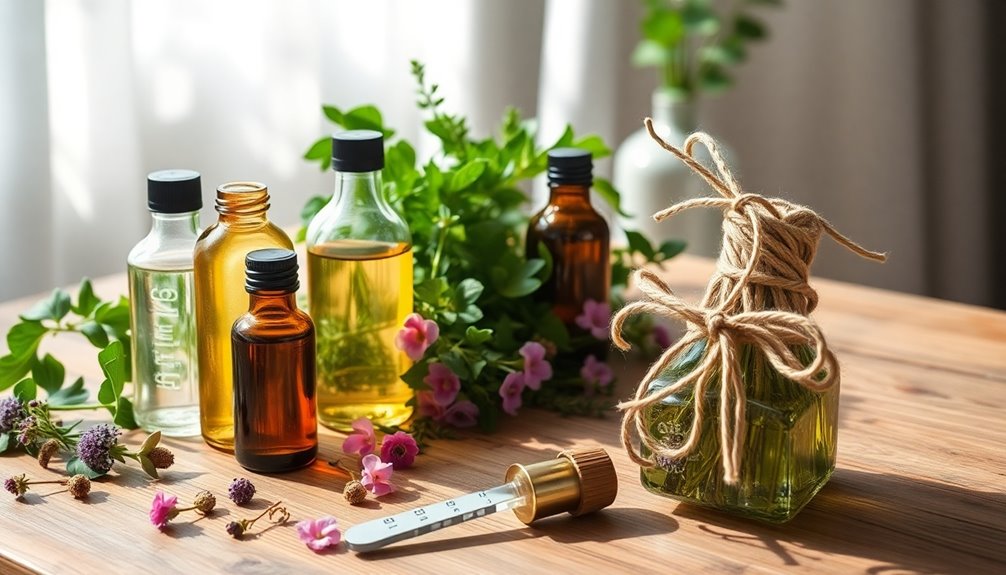
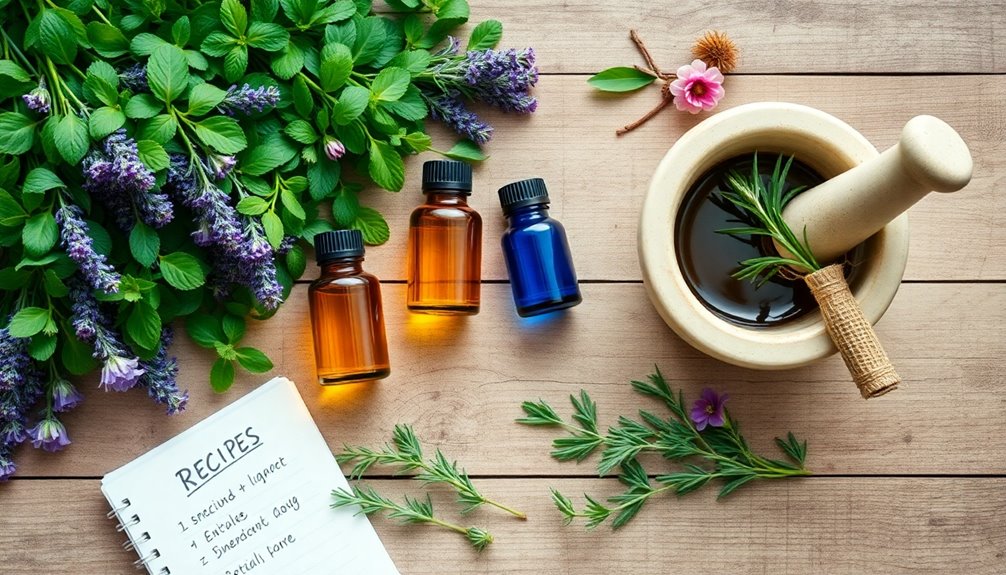
Tips for Essential Oil Blending

essential oil blending tips

When you start blending essential oils, understanding their different notes can elevate your creations to new heights. Focus on top notes like lemon for bright, initial scents, while base notes like sandalwood provide lasting depth.

A common blending ratio is 20-30% essential oils to 70-80% carrier oils, ensuring safe application on your skin. Experiment with 3-5 drops of each oil to discover unique combinations that resonate with you.

Always perform a patch test on a small area of skin before broader use to check for sensitivities.

Finally, store your blends in dark glass bottles to protect them from light and heat, preserving their potency and effectiveness for future aromatic adventures.

Happy blending!

Popular DIY Aromatherapy Projects

diy aromatherapy project ideas

Exploring popular DIY aromatherapy projects can be a rewarding way to enhance your space and well-being. By creating your own products, you can tailor scents to your preferences and enjoy the therapeutic benefits of essential oils.

Here are some projects to contemplate:

  • Homemade Essential Oil Blends: Mix oils like lavender and chamomile for relaxation.
  • DIY Room Spray: Combine distilled water with lemon and eucalyptus for a natural freshener.
  • Scented Candles: Melt beeswax or soy wax and add bergamot or vanilla for ambiance.
  • Aromatherapy Roll-Ons: Use a carrier oil with peppermint or tea tree oil for on-the-go relief.
  • Essential Oil Diffusers: Add water and eucalyptus or rosemary to disperse invigorating scents.

These projects are simple and fulfilling!

Frequently Asked Questions

What Is the 30/50/20 Rule for Essential Oils?

The 30/50/20 rule for essential oils helps you create safe and effective blends.

You'll use 30% essential oil, 50% carrier oil, and 20% other ingredients to guarantee a balanced formulation. This ratio prevents skin irritation and enhances absorption, making it perfect for topical applications like massage oils.

Remember to adjust the percentages for different uses, such as room sprays, and always conduct a patch test to check for any possible reactions.

How Do You Make Homemade Aromatherapy?

To make homemade aromatherapy, start by choosing high-quality essential oils that align with your needs, like lavender for calming effects.

Combine your chosen oils with a carrier oil—use a 1:2 or 1:3 ratio for safe skin application.

For room sprays, mix 10-15 drops of essential oil with 4 ounces of distilled water in a spray bottle.

Remember to shake it well before each use to keep the scent fresh and effective!

What Holds Essential Oil Smell Longest?

Think of essential oils as delicate flowers; their fragrance can fade if not cared for properly.

To hold the scent of essential oils the longest, store them in dark glass bottles to shield them from light and oxidation. Using carrier oils like jojoba helps stabilize the aroma, while blending with fixatives like myrrh can enhance longevity.

Ultimately, keep them in a cool, dark place, tightly sealed, to preserve their enchanting scent.

Can I Sell My Own Aromatherapy Products?

Yes, you can sell your own aromatherapy products, but you need to follow local regulations.

Make sure you understand labeling requirements and any necessary permits for cosmetics or skincare items.

Research the market to find popular products and customer preferences.

Use high-quality essential oils and document your formulations for transparency.

Creating a unique brand identity can help differentiate your products in a competitive market and build customer trust.

Conclusion

Now that you've revealed the secrets to creating your own aromatherapy products at home, why not elevate your space with your unique blends? With just a few essential oils and simple recipes, you can transform your environment into a fragrant sanctuary. Embrace sustainable practices and let your creativity flow as you experiment with different scents. Start your DIY journey today and discover the joy of crafting personalized aromatherapy products that not only smell great but also enhance your well-being!

Beginners Guides

How to Make Aromatherapy Playdough: Fun and Relaxing DIY!

Transform your relaxation routine with this easy aromatherapy playdough recipe that soothes the senses—discover the full process inside!

Published

on

aromatherapy playdough diy recipe

Making aromatherapy playdough is a fun, simple DIY project that'll add a calming touch to your day. Start by mixing 1 cup of flour, 1/2 cup of salt, and 1 tsp of cream of tartar in a saucepan. In a separate bowl, combine 1.5 tbsp of oil, 1 cup of water, and 10-15 drops of your favorite essential oil, like lavender. Stir the liquid into the dry mix and cook on medium heat until it thickens. Once cooled, you can enjoy your colorful, scented playdough, perfect for relaxation. Stick around to discover even more creative ideas and tips!

Key Takeaways

  • Combine 1 cup flour, 1/2 cup salt, and 1 tsp cream of tartar in a saucepan for the dry mix.
  • Mix 1.5 tbsp oil, 1 cup water, and 10-15 drops of essential oils in a separate cup.
  • Stir the liquid mixture into the dry ingredients until smooth and cook on medium heat for 3-5 minutes.
  • Once thickened, cool the dough on wax paper and store it in an airtight container.
  • Customize colors by adding food coloring after cooking for vibrant, fun variations.

Benefits of Aromatherapy Playdough

aromatherapy enhances playdough experience

Aromatherapy playdough offers a range of benefits that can greatly enhance a child's development and well-being. By incorporating calming lavender or other essential oils, you create a sensory experience that promotes relaxation, making it particularly beneficial for kids facing anxiety or attention challenges. Additionally, using essential oils like peppermint oil can provide a refreshing scent that may help boost focus and energy levels during play. The calming effects of lavender oil can further enhance the play experience, contributing to a more peaceful environment.

As your child engages in imaginative play with the scented playdough, they explore various themes and scenarios, fostering creativity. The tactile nature of molding and squishing playdough also helps develop fine motor skills, which are vital for their physical growth. Furthermore, the use of playdough can improve early literacy skills as they tell stories and create scenarios. Engaging in such play can also support emotional regulation in children, allowing them to express their feelings through creative outlets.

Plus, with a homemade playdough recipe being cost-effective—typically around $2 for materials—it's an accessible option for families looking to combine fun with developmental benefits.

Essential Ingredients for Playdough

playdough essential ingredient list

Creating your own aromatherapy playdough is simple and enjoyable, especially when you know the key ingredients to include.

To make a large batch of calming homemade playdough, start with 1 cup of all-purpose flour, 1/2 cup of salt, and 1 teaspoon of cream of tartar, which enhances texture.

Add 1.5 tablespoons of liquid cooking oil and 1 cup of water to the mixture. For the essential scents, incorporate 10-15 drops of lavender essential oil or your favorite citrus oils. Essential oils for aromatherapy can enhance the soothing experience.

Don't forget to add food coloring after cooking to create vibrant, customizable shades.

Combining these ingredients in a saucepan and heating them will yield a delightful, pliable playdough that's perfect for relaxation and fun!

Step-by-Step Preparation

detailed preparation process outlined

To prepare your aromatherapy playdough, start by gathering your dry ingredients. Combine 1 cup of all-purpose flour, 1/2 cup of salt, and 1 teaspoon of cream of tartar in a saucepan.

In a separate measuring cup, mix 1.5 tablespoons of liquid cooking oil, 1 cup of water, and your choice of essential oils, like lavender, for a calming scent.

Pour the liquid mixture into the dry ingredients and stir until smooth. Cook the mixture over medium heat, stirring frequently for about 3-5 minutes until it thickens and pulls away from the pan.

Once done, let the homemade play dough cool on wax paper. Store it in an air-tight container, perfect for busy moms and kids to use whenever they need some scented playdough fun!

Creative Uses and Gift Ideas

innovative gifting and creativity

Once you've made your aromatherapy playdough, the possibilities for creative uses and gifting are endless.

You can package your homemade playdough in jars or decorative bags, making unique gift ideas for friends and family. Themed sets with holiday-inspired scents can enhance seasonal engagement, providing fun and relaxation. By incorporating essential oils, you add therapeutic benefits, making your gift delightful for both kids and adults. Additionally, using essential oils can provide therapeutic benefits that are supported by recent studies. For instance, certain essential oils can promote skin health by improving mood and reducing stress levels. Incorporating oils such as lavender and bergamot can further elevate the sensory experience of your playdough. It's important to note that essential oils must be stored properly to maintain their potency and effectiveness.

Consider sending playdough via mail as a long-distance gift, ensuring loved ones enjoy a tactile experience. Additionally, you can use playdough in educational settings to promote sensory exploration and imaginative play, or include it as a playful addition to birthday party favors.

The options are as vast as your creativity!

Choosing the Right Essential Oils

selecting suitable essential oils

Choosing the right essential oils for your aromatherapy playdough can greatly enhance the sensory experience and therapeutic benefits.

For a calming option, consider using lavender, which promotes relaxation and stress relief, perfect for kids during playtime. Research shows that inhalation of essential oils can further enhance relaxation and reduce anxiety levels. Additionally, sun protection is important while playing outdoors to prevent skin damage from UV rays. The benefits of certain oils, like lavender, can be linked to their natural antibacterial properties, which contribute to a safer play environment.

Alternatively, citrus oils like lemon or wild orange offer uplifting scents that boost focus and creativity. Essential oils can improve indoor air quality, creating a pleasant environment for play.

Always opt for high-quality, 100% pure essential oils to guarantee safety, especially since children might ingest them. This ensures that you are using essential oils with natural antibacterial and antifungal properties, adding an extra layer of benefits.

A good rule of thumb is to add 10-15 drops of essential oil per batch, allowing you to customize based on personal preferences. You can even create unique blends, such as mixing lavender with vetiver, to enhance both the sensory experience and therapeutic benefits of your playdough. Research shows that pleasant scents can lead to increased feelings of happiness, making your playdough experience even more enjoyable.

Frequently Asked Questions

How Do You Make Aromatherapy Playdough?

To make aromatherapy playdough, you'll start by combining 1 cup of all-purpose flour, 1/2 cup of salt, 1 teaspoon of cream of tartar, 1.5 tablespoons of oil, and 1 cup of water in a saucepan.

Stir until smooth, then cook over medium heat for 3-5 minutes until it clumps.

Once cooled, add 10-15 drops of your favorite essential oils.

Finally, store your playdough in an airtight container to keep it fresh.

How Do You Make Playdough Interesting?

To make playdough interesting, you can mix in different essential oils to create unique scents that enhance the sensory experience.

Experiment with vibrant food coloring to stimulate creativity and match seasonal themes.

Use fun tools like cookie cutters and stamps for shaping, and encourage collaborative storytelling around your creations.

What Essential Oils Are Good for Scented Playdough?

When you're looking to make scented playdough, consider using essential oils like lavender, lemon, or chamomile.

Lavender's calming properties help promote relaxation, while citrus oils like lemon uplift and energize, boosting focus and creativity.

Chamomile is great for soothing anxiety, making it perfect for kids.

Don't forget vetiver, which offers grounding effects, ideal for children with ADHD.

Just make sure to use 10-15 drops of pure, food-grade essential oils for safety.

How to Make Homemade Playdough Smell Good?

Making homemade playdough smell good is like creating a fragrant garden in your hands.

Start by adding 10-15 drops of your favorite essential oil, such as lavender for relaxation or lemon for energy, during mixing. You can also include natural food coloring or dried herbs for added visual appeal.

Remember to use high-quality oils for the best scent. Store it in an airtight container, and enjoy the aroma for months!

Conclusion

As you knead the warm, fragrant dough between your fingers, let the soothing scents envelop you like a gentle hug. Aromatherapy playdough isn't just a fun craft; it's a pathway to relaxation and creativity. Each squeeze frees stress, while the vibrant colors spark joy in your heart. So, gather your ingredients, release your imagination, and let the calming aromas transport you to a serene oasis, where worries fade and happiness flourishes with every playful moment.

Continue Reading

Beginners Guides

How to Make an Aromatherapy Neck Wrap: DIY Relaxation Made Easy!

Create your own soothing aromatherapy neck wrap with just a few materials and discover the ultimate relaxation experience that awaits you.

Published

on

aromatherapy neck wrap tutorial

Making an aromatherapy neck wrap is simple and rewarding. Start by cutting two pieces of 100% cotton fabric, each 28 inches by 6 inches. Use Liquid Stitch glue for a no-sew option, sealing three sides. Fill it with 2-2.5 lbs of rice and a few drops of your favorite essential oil, like lavender or doTERRA Deep Blue, for extra relaxation. Seal the opening, then heat in the microwave for 90 seconds, checking regularly. This wrap can soothe muscle tension and enhance your relaxation experience. Want to learn more about using your neck wrap effectively?

Key Takeaways

  • Cut two pieces of 100% cotton fabric measuring 28 inches by 6 inches for the neck wrap.
  • Fill the wrap with 2-2.5 lbs of rice, flaxseed, or buckwheat for optimal heat retention.
  • Infuse the filling with essential oils like lavender or doTERRA Deep Blue for added aromatherapy benefits.
  • Seal the opening using Liquid Stitch glue or apply a French seam to prevent fraying.
  • Heat the neck wrap in the microwave for 90 seconds, checking temperature every 30 seconds for safety.

Understanding Neck Wraps

neck wraps for comfort

Neck wraps are versatile tools designed to provide targeted relief for muscle tension and discomfort in your neck and shoulders. Filled with materials like rice, flaxseed, or buckwheat, you can easily heat your neck wrap in the microwave or chill it in the freezer for customized comfort.

The adjustable design allows for hands-free use, making it perfect for relaxation during work or leisure activities. Many neck wraps also incorporate essential oils, which enhance their soothing effects through aromatherapy, creating a more immersive experience.

Whether you're recovering from a workout or unwinding after a long day, a neck wrap serves as an ideal companion. Plus, they make thoughtful, handmade gifts for loved ones seeking relief and relaxation.

Essential Materials Required

necessary items needed urgently

Creating your own DIY aromatherapy neck wrap is a rewarding project that requires only a few essential materials.

You'll need two pieces of 100% cotton fabric, each measuring 28 inches by 6 inches, to guarantee comfort and safety in the microwave. Glycolic acid can be beneficial for skin when used properly, allowing for a soothing experience while using your neck wrap. Additionally, using rapeseed honey can enhance the skin's hydration during your relaxation routine.

For assembly, Liquid Stitch glue is a fantastic no-sew option, making this project accessible even if you don't sew.

You'll also require approximately 2-2.5 lbs of rice for filling, which provides the necessary weight and heat retention for effective muscle relief.

To personalize your neck wrap, consider adding essential oils like doTERRA Deep Blue or lavender, enhancing its therapeutic benefits. Incorporating oils such as eucalyptus oil can also provide additional relief for sinus congestion.

Finally, gather heavy items like books to secure the fabric while the glue dries, ensuring durability.

Step-by-Step Construction

detailed building instructions provided

To begin constructing your DIY aromatherapy neck wrap, first cut two pieces of cotton fabric, each measuring 28 inches by 6 inches.

Apply Liquid Stitch glue along the outer ½ inch border of three sides for assembly.

  • Place heavy items on top while it dries for 24 hours.
  • Turn the wrap inside out through the unglued opening.
  • Fill the wrap with 2-2.5 lbs of rice, keeping it flexible, and tuck the fabric before sealing the opening with glue.

For added relaxation, consider dropping a few essential oils like doTERRA Deep Blue or lavender inside, as essential oils provide natural antibacterial and antifungal properties that can enhance your relaxation experience.

Finally, microwave your neck wrap in 30-second increments, watching the temperature to avoid overheating. Enjoy your soothing creation!

Sewing Techniques for Durability

durable sewing techniques explained

When constructing your DIY aromatherapy neck wrap, employing effective sewing techniques guarantees durability and a polished finish. Start by using a serger or French seam technique to finish the fabric edges, preventing fraying. Opt for 100% cotton thread, especially in areas exposed to microwave heat, to avoid melting. When sewing the long seams, maintain a consistent stitch length of 1/4 inch to prevent distortion. Additionally, ensure that the materials you choose are suitable for essential oils to avoid degradation over time.

Technique Purpose
French Seam Prevents fraying
Reinforced Seams Enhances durability
Pre-washing Fabric Maintains shape after washing

Reinforce the seams at both ends to withstand regular use, especially where the filling is inserted. These sewing techniques will guarantee your neck wrap lasts! Additionally, consider using manufacturer guidelines to ensure that your materials and methods are appropriate for long-lasting results.

Adding Aromatherapy Benefits

aromatherapy enhances well being benefits

Enhancing your DIY aromatherapy neck wrap with essential oils can transform it into a powerful tool for relaxation and relief. By incorporating the right scents, you can target specific needs, like muscle soreness or stress reduction.

Here are some essential oils to take into account:

  • Lavender: Promotes relaxation and reduces tension.
  • Peppermint: Invigorates and alleviates headaches.
  • doTERRA Deep Blue: Targets muscle discomfort. Cognitive benefits of peppermint can additionally help improve overall alertness during use. Using oils with antibacterial properties can also enhance the therapeutic effects of your neck wrap.

To achieve ideal aromatherapy effects, mix your chosen essential oils with the filling material and let it sit for a day. This allows for even scent distribution. Additionally, consider using carrier oils to dilute essential oils for safe application on the skin. Regular use of essential oils can create a positive environment that reduces stress and promotes well-being.

Regular use of aromatherapy in your neck wrap not only enhances immediate relaxation but can also improve your emotional health and sleep quality over time.

Enjoy your soothing experience!

Usage and Care Instructions

usage and care guidelines

To get the most out of your aromatherapy neck wrap, you'll need to follow some simple heating guidelines.

Remember to check the temperature before applying it to your skin, and consider using a removable cover for easier cleaning.

Regular maintenance is key, so keep an eye on the filling and replace it every few months to guarantee it stays effective and hygienic.

Heating Guidelines

Before you heat your aromatherapy neck wrap, make certain to follow the guidelines for ideal safety and effectiveness.

Proper heating will help soothe your muscles without causing burns. Here's how to do it right:

  • Heat for 90 seconds in the microwave, checking at 30-second intervals for additional warmth.
  • Allow it to cool for a moment before applying directly to your skin.
  • For children, limit heating to 30-60 seconds and supervise closely.

After heating, the neck wrap retains warmth for about 20 minutes, providing soothing relief for tension.

Remember, always monitor the wrap to prevent overheating and ascertain safe usage.

With these heating guidelines, you can enjoy a relaxing experience without any worries!

Cleaning and Maintenance

After enjoying the soothing benefits of your aromatherapy neck wrap, it's important to keep it clean and well-maintained for continued effectiveness.

Wash the fabric regularly and replace the filling every 3 to 6 months to guarantee hygiene. Consider making a removable cover for easier cleaning, which also prolongs the life of the inner filling.

Always monitor the heating time; heat it for 90 seconds for adults and 30 to 60 seconds for children to avoid overheating.

After use, let the wrap cool completely before storing it to prevent moisture buildup, which can lead to mold.

If you're adding essential oils, mix them into the filling and let it sit for 24 hours for even fragrance distribution, reapplying as needed.

Community Tips and Insights

community advice and knowledge

Have you ever wondered how to enhance your DIY aromatherapy neck wrap? Many community members have shared valuable tips that can elevate your crafting experience.

  • Use 100% cotton or linen fabric for comfort and microwave safety.
  • Fill your wrap with flaxseed or rice mixed with essential oils like lavender or peppermint for soothing effects.
  • Pre-wash your fabric to prevent shrinkage and guarantee a perfect fit.

A popular suggestion is to use a wide-neck funnel for easy filling, making the process smoother and less messy. Additionally, the process of crafting can be a form of self-discovery and personal growth, enhancing your overall wellness experience. Engaging in eco-friendly practices, such as using renewable resources, can also add a sustainable touch to your crafting.

Immersing yourself in these insights to make your aromatherapy neck wrap even more effective!

Additional Resources and Support

extra help and resources

Enhancing your aromatherapy neck wrap experience doesn't stop with crafting; plenty of resources can support your journey.

Explore video tutorials that provide visual guidance, making the crafting process easier for beginners. You can also download a free eBook featuring 100 uses for essential oils, which can deepen your understanding of aromatherapy applications alongside your neck wrap.

For added therapeutic benefits, check out doTERRA products and learn how to incorporate them into your wraps.

Don't forget to sign up for periodic email updates that offer holistic health tips and project ideas.

Finally, join online communities where you can share experiences and tips with fellow DIY enthusiasts, creating a supportive network for your aromatherapy journey.

Frequently Asked Questions

What to Fill Neck Wraps With?

When filling neck wraps, you've got some great options. Long-grained white rice works well because it retains heat effectively.

Flaxseed is another fantastic choice, offering a soothing texture and longer heat retention. You might also consider buckwheat, barley, oatmeal, or feed corn, each bringing unique properties.

Just steer clear of instant rice, as it can cook in the microwave. For added aromatherapy, mix in essential oils or spices and let it sit for a day.

How to Make a Neck Protector?

Did you know that 80% of adults experience neck pain at some point in their lives?

To make a neck protector, start by cutting two pieces of 100% cotton fabric, each measuring 28 inches by 6 inches.

Use Liquid Stitch glue to secure three sides, leaving one short side open. Fill it with about 2-2.5 lbs of rice for weight, then seal the open end.

Let it dry under heavy items for 24 hours, and you're done!

How to Make Aromatherapy Neck Pillows?

To make aromatherapy neck pillows, start by grabbing an old sock and filling it with 2-3 cups of uncooked rice or dried herbs.

You can enhance the scent by adding a few drops of essential oils like lavender.

Once filled, hand-stitch the sock closed or tie it securely.

This quick project should only take about 15 minutes, and using soft fabrics will guarantee it's comfortable around your neck for relaxation.

What to Fill a Neck Pillow With?

Did you know that using the right filling can enhance comfort and relaxation? For your neck pillow, consider using long-grained white rice, flaxseed, or buckwheat, as they retain heat well.

Avoid instant rice to prevent hazards. Mix in dried herbs or essential oils for a soothing aroma, letting it sit for a day to blend.

Fill it about ½ to ¾ full for flexibility, ensuring it molds perfectly to your neck while providing warmth.

Conclusion

Creating your own aromatherapy neck wrap is like crafting a cozy hug for your body and mind. With a few simple materials and some crafty techniques, you can easily bring relaxation into your routine. Don't forget to personalize it with your favorite scents and care tips to keep it fresh. So, gather your supplies, follow the steps, and enjoy the soothing benefits of your homemade neck wrap whenever you need a little extra comfort in your day.

Continue Reading

Beginners Guides

How Long Are Aromatherapy Sessions? What You Need to Know!

Breathe in the benefits of aromatherapy sessions, but discover the essential details that can elevate your experience and ensure safety.

Published

on

aromatherapy session duration guidelines

Aromatherapy sessions usually last anywhere from 5 to 90 minutes, depending on what you're aiming for. A quick energy boost can take just 5 to 10 minutes, while relaxation sessions typically range from 15 to 30 minutes. If you're focusing on sleep support, diffusing essential oils for 20 to 30 minutes before bedtime is common. Longer sessions may involve a personalized blend and more extensive techniques to address various needs. To prepare well and guarantee safety, there are a few important things you should know that can enhance your experience. Stick around to discover those details!

Key Takeaways

  • Aromatherapy sessions typically last between 5 to 90 minutes, depending on the treatment goals and techniques used.
  • Relaxation and stress relief sessions are generally recommended for 15 to 30 minutes.
  • Sleep support sessions involve diffusing essential oils for 20 to 30 minutes before bedtime.
  • Quick energy boosts can be achieved in as little as 5 to 10 minutes of inhalation.
  • Pain relief treatments may require topical applications for 5 to 10 minutes, repeated several times a day.

Overview of Aromatherapy Sessions

aromatherapy session overview details

Aromatherapy sessions offer a focused approach to enhancing your well-being, whether you're seeking relaxation, support for sleep, or pain relief. During these sessions, you can enjoy the therapeutic benefits of essential oils. For relaxation and stress relief, inhalation or diffusion of essential oils for 15–30 minutes is ideal. If you need a quick energy boost or improved focus, short 5–10 minute inhalation sessions work well. Essential oils for mental clarity can also be beneficial in enhancing focus and mood during these sessions.

For pain relief, consider brief topical applications lasting 5–10 minutes, which you can repeat 2–3 times daily as needed. Timing's vital; prolonged exposure can lead to adverse effects, while proper intervals maximize the therapeutic benefits and enhance your overall experience. Incorporating essential oils can also reduce cortisol levels, contributing to a more relaxed state during your sessions. Embrace these sessions to support your health journey!

Duration of Typical Sessions

typical session duration details

Typically, aromatherapy sessions range from 5 to 30 minutes, depending on your specific goals.

For relaxation and stress relief, aim for sessions lasting 15 to 30 minutes to maximize therapeutic benefits. If you're seeking sleep support, diffuse essential oils for 20 to 30 minutes before bedtime; low output overnight can continue the effects safely.

On the other hand, energy or focus sessions can be shorter, lasting just 5 to 10 minutes of inhalation, perfect for repeating throughout the day.

For pain relief, topical applications usually require brief sessions of 5 to 10 minutes, repeated 2 to 3 times daily.

Factors Influencing Session Length

session length influencing factors

Your goals play a crucial role in determining how long your aromatherapy sessions should last. Depending on what you want to achieve, session length can vary greatly. Here are some factors to evaluate:

  1. Desired Outcome: For relaxation and stress relief, sessions typically last 15-30 minutes. If you're focusing on energy or concentration, just 5-10 minutes might suffice.
  2. Application Method: Diffusing essential oils before bedtime for 20-30 minutes can aid sleep, while topical applications for pain relief should be shorter, around 5-10 minutes.
  3. Personal Sensitivity: Everyone's response to aromatherapy varies; adjust your session lengths based on your individual sensitivity and personal preferences to maximize benefits.

Types of Aromatherapy Techniques

aromatherapy method variations explained

There are several effective techniques you can use to experience the benefits of aromatherapy. Here's a quick overview of some popular methods:

Technique Description
Inhalation Techniques Using essential oils in diffusers or steam tents for respiratory support and mental clarity.
Aromatherapy Massage Topical applications of essential oils mixed with a carrier oil, providing relaxation and relief.
Aromatherapy Baths Combining essential oils with warm water for a soothing experience and skin absorption.

You can also explore compresses, where essential oils are mixed with water for targeted relief. Remember, always consult a qualified aromatherapist when considering internal applications of essential oils. Each technique offers unique benefits tailored to your needs. Additionally, techniques like aromatherapy massage can help relieve muscle tension and pain, enhancing overall wellness.

Benefits of Shorter Sessions

enhanced focus and efficiency
  1. Quick Boosts: Shorter sessions, lasting 5–10 minutes, can enhance your energy or focus with essential oils, perfect for a brief respite during your day.
  2. Localized Relief: Applying essential oils topically can provide targeted relief for pain, allowing you to repeat this 2–3 times daily for maximum effect.
  3. Soothing Atmosphere: Diffusing essential oils for 15–20 minutes creates a calming environment without overwhelming your senses, ensuring relaxation and stress relief. Additionally, essential oils for toothache relief can be particularly effective if you're looking to address specific discomfort quickly.

Recommendations for Frequency

optimal frequency guidelines suggested

To maximize the benefits of aromatherapy, it's essential to contemplate the frequency and duration of your sessions. For relaxation and stress relief, aim for 15–30 minute aromatherapy sessions. If you seek sleep support, consider 20–30 minutes of diffusion before bedtime, with low output diffusion safe throughout the night. Quick energy boosts? Inhale essential oils for 5–10 minutes, repeating as needed. For pain relief, topical applications should last 5–10 minutes, with 2–3 sessions daily for best relief. Remember to maintain intervals of 2–3 hours between sessions to prevent sensory fatigue and enhance therapeutic benefits.

Session Type Duration Frequency
Relaxation 15–30 minutes As needed
Sleep Support 20–30 minutes Before bedtime
Pain Relief 5–10 minutes 2–3 times daily

Preparing for Your Session

session preparation guidelines overview

Before your aromatherapy session, pick high-quality essential oils that align with your goals for the best results. Also, consider what you'll wear; loose, comfortable clothing will help you relax and enjoy the experience. Preparing these details in advance sets the stage for a more effective session. Additionally, choosing oils with calming effects can significantly enhance your overall experience. Furthermore, it's essential to test for skin allergies to ensure that the oils you select are safe for your skin.

Essential Oil Selection

Selecting the right essential oils is crucial for enhancing your aromatherapy session. High-quality, pure essential oils can provide distinct therapeutic benefits, so choose wisely.

Here are three tips for effective essential oil selection:

  1. Choose popular options: Consider lavender for relaxation, eucalyptus for respiratory support, and peppermint for an energy boost.
  2. Follow dilution guidelines: Use 5–10 drops of a single oil in your diffuser, or blend 2–3 drops each of chosen oils for a balanced aroma.
  3. Read manufacturer's guidelines: Always follow the manufacturer's instructions for safe usage and proper dilution to maximize benefits during your session.

Experiment with different oils and concentrations to find what resonates best with your preferences.

Session Attire Recommendations

As you prepare for your aromatherapy session, choosing the right attire can enhance your overall experience.

Follow these session attire recommendations to guarantee comfort and relaxation. Wear comfortable, loose-fitting clothing that allows for ease of movement, especially if you're receiving an aromatherapy massage.

Consider clothing that can be easily adjusted or removed, as essential oils may be applied directly to the skin. Avoid heavy fragrances and scented products beforehand to let the oils shine without skin irritation.

Opt for natural fabrics like cotton or linen for breathability. Finally, depending on your treatment, you might want to bring a pair of socks or a blanket for added warmth and coziness during your session.

Safety Considerations

safety precautions and measures

While enjoying the benefits of aromatherapy, it's important to prioritize safety to prevent any adverse effects. Here are some key safety considerations to keep in mind:

  1. Dilute essential oils with a carrier oil before applying them to your skin to avoid irritation and adverse reactions.
  2. Conduct a patch test to check for any allergic reactions before using a new oil extensively.
  3. Guarantee proper ventilation while diffusing oils, especially around pregnant individuals, as some oils may pose risks to them or the developing fetus.

Additionally, always keep essential oils out of reach of children and pets to prevent accidental ingestion or exposure. Remember to consult a veterinarian before using any oils around your pets, as certain oils can be toxic to them.

Taking these precautions will help you enjoy aromatherapy safely and effectively.

Finding a Qualified Practitioner

locating a skilled professional

Finding a qualified aromatherapist can greatly enhance your experience and guarantee you receive safe, effective treatment. Start your search by looking for practitioners registered with professional organizations like the International Federation of Aromatherapists.

It's also wise to consult healthcare professionals for trusted recommendations. During your initial consultation, which typically lasts up to one hour, the practitioner will assess your health history and establish specific treatment goals to create a tailored aromatherapy plan.

Verify the aromatherapist holds professional insurance, as this is essential for practice, even without strict legal requirements. Utilize directories like Treatwisers to find local aromatherapy practitioners who meet industry standards and offer appropriate therapies to support your wellness journey.

Frequently Asked Questions

How Long Is an Aromatherapy Session?

Aromatherapy sessions typically range from 5 to 30 minutes, depending on your needs.

If you're looking for relaxation, aim for 15 to 30 minutes to fully absorb the benefits of the essential oils.

For quick energy boosts or focus, just 5 to 10 minutes can do the trick.

What Happens in a Typical Aromatherapy Session?

In a typical aromatherapy session, you start with an initial consultation where your aromatherapist discusses your health history and treatment goals.

They'll select essential oils tailored to your needs, which you might inhale, apply topically, or enjoy through massage.

During the session, oils are often diluted with carrier oils for safety.

Afterward, your aromatherapist may recommend at-home treatments, encouraging you to continue your self-care journey with the chosen essential oils.

How Long Should Aromatherapy Take?

Aromatherapy can feel like a gentle breeze, lifting your stress away.

When you consider how long it should take, think about your goals. For relaxation, sessions can last 15 to 30 minutes, while quick bursts of energy might only need 5 to 10 minutes.

You can tailor the duration to your needs, starting shorter and gradually extending as you become more comfortable.

Listen to your body, and let it guide you.

How Long Is an Aromatherapy Course?

Aromatherapy courses vary in length, so you've got options. They can range from a few days for introductory workshops to several months for extensive certifications.

If you're pursuing professional training, expect to commit anywhere from 40 to 300 hours, depending on your goals. Some programs offer online modules for flexibility, while others require hands-on workshops.

Just keep in mind that continuing education might be necessary to maintain your certification over time.

Conclusion

In just a short session, you can experience the calming benefits of aromatherapy, even if you're busy. Don't worry if you think you don't have enough time; even 30 minutes can work wonders for your well-being. Whether you choose a quick pick-me-up or a longer, deeper experience, aromatherapy fits into your schedule. So why not give it a try? You might just discover a new favorite way to relax and rejuvenate!

Continue Reading

Affiliate Disclaimer
As an affiliate, we may earn a commission from qualifying purchases. We get commissions for purchases made through links on this website from Amazon and other third parties.

Vetted

top home security systems top home security systems
Vetted51 minutes ago

15 Best Home Security Systems of 2025 – Protect Your Home With Confidence

With the 15 best home security systems of 2025, discover which innovative features will keep your home safe and secure—read...

top home fitness bikes top home fitness bikes
Vetted6 hours ago

15 Best Exercise Bikes of 2025 – Your Ultimate Guide to Staying Fit at Home

Stay fit at home with the 15 best exercise bikes of 2025, but which one will transform your workouts? Discover...

perfectly baked goods pans perfectly baked goods pans
Vetted10 hours ago

15 Best Baking Pans for Perfectly Baked Goods Every Time

On the hunt for the perfect baking pans? Discover the top 15 options that elevate your baking game and ensure...

top lawn mowers guide top lawn mowers guide
Vetted15 hours ago

15 Best Lawn Mowers of 2025: Your Ultimate Guide to a Perfect Lawn

Join us as we uncover the 15 best lawn mowers of 2025, perfect for achieving your dream lawn—discover which one...

top waterproof hiking boots top waterproof hiking boots
Vetted20 hours ago

15 Best Waterproof Hiking Boots for Every Adventurer in 2025

Step into the future of outdoor adventures with the 15 best waterproof hiking boots for 2025, where comfort meets durability...

stylish couch cover options stylish couch cover options
Vetted1 day ago

15 Best Couch Covers to Refresh Your Living Space in Style

Jumpstart your home makeover with these 15 stylish couch covers that promise to transform your space—find out which ones make...

top electric toothbrush recommendations top electric toothbrush recommendations
Vetted1 day ago

15 Best Electric Toothbrushes of 2025 for a Healthier Smile

With 2025's top electric toothbrushes, discover the features that can transform your oral care routine—what makes them essential for a...

top cookware sets 2025 top cookware sets 2025
Vetted1 day ago

15 Best Cookware Sets of 2025 – Elevate Your Culinary Skills

Discover the 15 best cookware sets of 2025 that can transform your cooking experience—find out which sets made the cut!

top cycling safety gear top cycling safety gear
Vetted2 days ago

15 Best Bike Helmets of 2025 – Safety Meets Style for Every Cyclist

Learn about the top 15 bike helmets of 2025 that combine unmatched safety and striking style, and discover which one...

top durable bright flashlights top durable bright flashlights
Vetted2 days ago

15 Best Flashlights of 2025: Brightness and Durability You Can Count On

The 15 best flashlights of 2025 promise unmatched brightness and durability, but which one will illuminate your path the best?...

top hiking backpacks reviewed top hiking backpacks reviewed
Vetted2 days ago

15 Best Hiking Backpacks for Your Next Adventure – Expert Reviews and Recommendations

Keep exploring the top 15 hiking backpacks that blend comfort and functionality, and discover which one will elevate your next...

top kitchen appliances 2025 top kitchen appliances 2025
Vetted2 days ago

15 Best Kitchen Appliances to Elevate Your Culinary Experience in 2025

With the top 15 kitchen appliances of 2025, discover how these innovative tools can transform your cooking game like never...

Trending